How to Host: A Mountainside Campground Cookout

A camping cookout is about feeding the crew as I lovingly call them is all about bulk. Get everyone fed for cheap.
Why Do I Do this?
Because I love my family, duh! No, it’s a labor of love at this point when my family goes up to Ouray Colorado for a Jeep invasion. My dad had worked the donations and BBQ for about six years before I got the opportunity to actually go in person. But I always helped him get donors for the raffle and find inexpensive ways to feed the patrons of the event.
What is the Ouray Jeep invasion?
It’s pretty much what it sounds like. I run with a fair group of old jeeps (called Full Size Jeeps, or FSJs) and we all meet up from all over the world in the tiny mountain town of Ouray Colorado for three days (Wednesday – Friday) in the third week of July.
We always have a potluck barbeque on Thursday in order to raise money for the Ouray Mountain rescue. This is under the small delusion that if we give them money, then we won’t need them. But the reality is that we are one of their biggest donors, and have been since 2002 when it started and many of our people have been part of rescues while they’re on the trails.
Gettin’ Down to Business
With the origins of the Que for a Crew concept being a potluck, the menu is going to give you a range of lower effort, low cost options that help feed upwards of 30 people. It’s still going to take some prep and brain power.
I can’t use a crock pot to save my ever loving soul, so I rely on Dutch ovens for pretty much everything. There is just one problem with that… Acid and cast iron NEVER GO TOGETHER. I mean it; it’s a one way ticket to rust. So, I cheat. I make my pulled pork in an enameled Dutch oven from the comfort of my house before I leave. Then use good ol’ disposable aluminum pans to reheat them.
Menu
Make Ahead Pulled Pork
I don’t have a hard and fast recipe for pulled pork. But this is my favorite to use from allrecipes.com.
White Bread
No buns, no fancy breads. Just good ol’ loaves of sliced white bread. Whatever is on sale. If you’re feeling fancy, get a tub of spreadable butter.
Coleslaw
If you can find a large vat-sized container of coleslaw, please use that if it is less expensive than the home-made alternative. If you, like me, don’t have that luxury all the time. Here’s one of my favorite recipe for classic coleslaw.
Potato Chips
Three flavors of party sized bags: Plain, sour cream and something, and flavored corn chips. That pretty much covers your basics for chips. If you’re more concerned about germs, I get you. You can buy a giant box of mini bags of chips with the rough number of people you’re expecting.
Additions
When you are feeding a large group, potluck style is the way to go. The best way to do that is with a list of extras. Don’t know what to have people bring? Fear not! I have plenty of extras that you can have other people bring.
Pickles
2 L soda, gallon Lemonade, tea or bottled water
Bulk pack cookies or candy
Extra chips or sides
Or have them bring something from the DON’T Forget! List:
Paper plates
Disposable cutlery
Napkins
Trash Bags
Plastic cups
Serving spoons
Salt & Pepper in Shakers
Feeding a large group is no easy feat; I commend you for wanting to. No matter if your crew is 5 people or 50 people this scalable menu is sure to please your crowd and your wallet. Make sure to keep those stories flowing around the campfire this summer.
5 Must-Haves for any Potluck
This post contains affiliate links, where I earn a commission on purchases.
Whether you’re the host or a guest these are the five must-haves for a potluck. Some things are universal between host and guest, but others I feel are the responsibility of the host alone.
Non negotiables for a host are:
- Main Dish
- Two Sides (i.e. one veg and one starch)
- Napkins & Dinnerware
It feels uncouth as a host to have someone else bring the main dish. The only reason I can think of for a guest to bring the main dish is because they offered due to a cooking method or allergy.
1. Portable Dishes (Guest)
- Bring dishes that are easy to transport.
- Use containers with secure lids to prevent spills during transit.
- Disposable isn’t always best
2. Serving Utensils (Guest & Host)
- Pack serving spoons, forks, tongs, and ladles for your dish.
- Ensure you have the appropriate utensils for both hot and cold dishes.
3. Labeling Supplies (Host)
- Have labels and markers to identify each dish clearly.
- Include any allergen information to help guests with dietary restrictions.
4. Beverages (Guest & Host)
- Offer a variety of drinks suitable for different preferences.
- Include non-alcoholic options like water, soda, or juice.
5. Desserts or Sweet Treats (Guest & Host)
- Bring a dessert to satisfy those with a sweet tooth.
- Consider options that are easy to share and serve, such as cookies or brownies.
It’s hard to decide what’s the concern of your guest or of yourself as the host for a potluck. A good rule of thumb is to create the basic menu, survey what you have and see what you want to add. Take what you want to add and have your guests bring those.
As a guest, I highly recommend testing dishes out on the other guests. A potluck can be a great time to test new recipes. If you’re unsure what food to bring to a potluck as a guest, feel free to look through my potluck dish post.
Although hosting or guesting can be challenging to navigate, these must-haves will get you well on your way to being a hosting or guest pro. Happy Hosting!
Last Minute Budget Friendly Dinner
This post contains affiliate links of which I get a commission on purchases from the links.

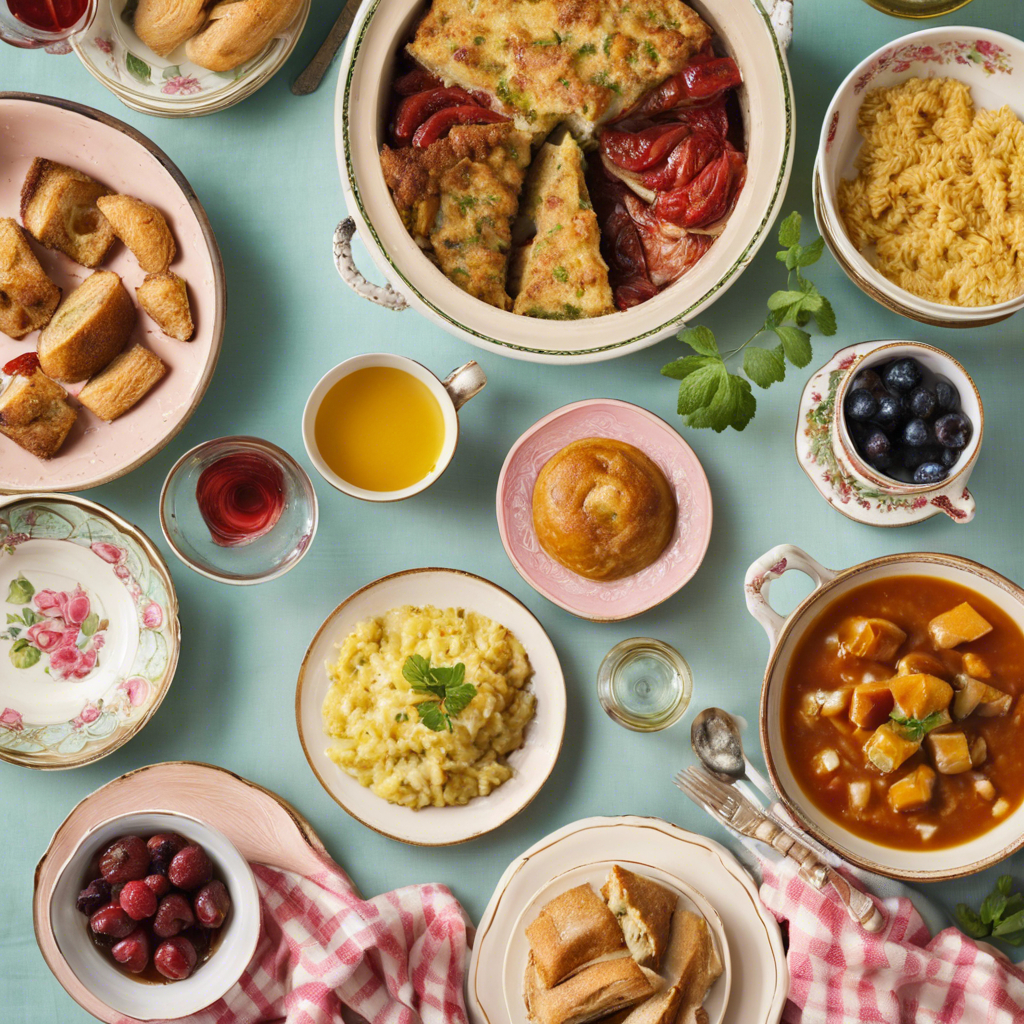
A dinner club menu doesn’t have to take all day or be overly complicated. This budget friendly dinner is built to feed a small crowd or provide leftovers for later in the week.
This one is all about comfort with friends without breaking the bank. This will be a little different than my other virtual Dinner Club menus because I’ll be breaking down the price and showing you where you can change up the recipes to fit your family or guests. This menu also works swimmingly for an easy weeknight dinner.
Menu
Stuffed Pepper Skillet: From Valerie’s Kitchen
I love this recipe as a base, the only thing I change on it regularly is the type of cheese I use. I usually use cheddar or mozzarella depending on my mood. Spoon it into a bowl and serve. Bell peppers are usually 2 for $5 once a month in my area or $3 each not on sale, yes that’s not budget friendly to some people. But this cost is totally worth it for the nutrition even if you are hosting a fun night.
Cheesy Toast: Savory with Soul
Salad Kit: Taylor’s Green Goddess Chopped Salad or Taylors Ultimate Cheddar Ranch Chopped Salad
In this situation, salad kits are the way to go! They come out more budget friendly than what it would cost for the ingredients. Plus it is a dump and go with no left overs going back into the fridge! Each kit is about $4, which feeds about four people depending on how much each person serves. One bag usually feeds two people in my family (we love our extra vegetables).
Pound Cake, Strawberries & Cream: Sara Lee’s Frozen Pound Cake, strawberry compote (broke bank vegan) and whipped topping.
Sara Lee’s brand is about $5 per cake, which serves about 6.
Frozen strawberries are around $4 per pound, which also serves about six once it’s cooked.
Serving & Extras
There are no fancy decorations for this one. You could use a vinyl table cover, or a basic cotton tablecloth. I prefer a basic cotton tablecloth. Why? Because it’s washable. If someone accidentally uses it as a napkin for your hands (or not accidentally) just throw it in the washer after everyone goes home.
Family style, serve in the skillet meal. Mix the salad in the serving bowl. Use a plastic serving tray or dinner plate for the cheesy bread. Easy clean plastic plates and metal cutlery. Paper napkins all the way; invest the extra dollar for the ones that will actually hold up to saucy meals.
Round it Out
Whether your dinner club is a social gathering or a weeknight dinner that you want to upgrade a little it doesn’t have to break the bank. This menu and set up work great for impromptu guests and/or family visiting from out of town.
Campsite Cooking Essentials You Must Have

Campsite cooking is an imperfect science, and that’s what I love about it! There is no cheating your way out of a fresh meal cooked over a fire. However, some things just make life easier and help get you flavorful food right off the fire pit.
While I’m not one of those people who grew up camping every weekend. I did spend many summers around a fire pit or helping the dad-man prepare for camping trips in his Jeep. Now I could tell you to drop your tailgate and throw a camp stove on it and you’re good to go. And that is a way you can go; I’ve done it many times. Though, that’s not the way to get that campfire flavor or fun.
A lot of these might be self-explanatory, but these are all things that I or my dad have forgotten while packing in the past and wind up having to borrow from someone else. Now that’s not a bad thing, but I’d rather people be prepared.
Dutch Oven
I highly recommend getting a cast iron Dutch oven. They are an investment, but well worth the investment if you’re looking for something that will serve you for years to come. They heat up quickly and cool down slowly leaving you the ability to keep adding and cooking things without worrying about the temperature dropping.
Seasoning
I might be the definition of a tiny white girl, but there is no bland food allowed in my fabled kitchen. Sure you could use just basic salt and pepper, but that’s no fun when you’re being one with nature. Campsite cooking is about creativity and simplicity. Typically I’m a big fan of using flavors found in or inspired by where I’m staying; that gets expensive. Of course, you need the basics: salt and pepper. But I like to have a season all, like slap yo’ mama or good ol’ Lawry’s. As well as a seasoning cylinder as I call them.
Cheap Serving ware
Cheap is the keyword here. You don’t want to take your good serving spoons to a campground or camp area where they can get stolen and broken. I like to have both metal and plastic serving ware with me as well because cast iron will melt plastic if you leave it in the pan as opposed to metal ones which will just get warm.
Can Opener
Say it with me now, cheap is okay when it comes to certain things when camping. And again the can opener is one of them. I don’t like the more expensive can openers because they don’t work with my grip abilities.
Knives with sheaths
Sheathed knives are non-negotiable to me. I’m beyond clumsy and I’m not about to slice a finger because I blindly stuck my hand into my camping gear. I’m also a big fan of bright colors, for more reasons than they’re pretty. Bright colors make it easier to find your knives and sheaths when cleaning up the site.
Cheap Wooden Spoons
Back at it with the explicitly cheap products. I’m a firm believer that the cheap multi-packs of wooden spoons are better than the fancy, coated ones.
Cutting Board
I have a plastic one that I use for camping. The down side to that is that you have to clean it very well after every use. Now, you should do this with any cutting board. But I will be replacing mine with wood in the future because of the antimicrobial effects. But plastic has served me very well. It’s important that whatever cutting board you choose is sturdy because you never know what your counter is going to be made of until you get to the camp ground.
Leather Gloves
Sounds stupid, but trust me: when your’re campsite cooking leather gloves are the best! You’ll need it when you’re working with cast iron pans or Dutch ovens. These suckers get hot and stay hot. If you go at it with any old pot holder, you’re going to regret it. I cannot stress it enough to get a good pair of leather gloves. What defines a good pair of gloves? Thick, but it still gives you dexterity. Other than that, price doesn’t matter.
Bonus: Tool chest or Large plastic Container
A water-proof container with a lid is essential for toting all your cooking supplies. I grew up with my dad having both in the back of his jeep. I do not, however, think you need both unless you want both or have that much camping gear dedicated to cooking. What it must have is a locking lid and water resistant at the very least because you don’t want things to be waterlogged and rusting.
Happy Camping.
10 Refreshing Easy Summer Mocktails Perfect for Your Next Party
This post contains affiliate links of which I earn a commission on purchases.

Summertime is all about soaking up the sunshine, lounging by the pool, and enjoying deliciously refreshing drinks. And what better way to cool off than with a selection of mouthwatering mocktails that are not only easy to make but also guaranteed to impress your guests at your next summer party? Whether you’re cutting back on alcohol, hosting a family-friendly event, or simply in the mood for some guilt-free indulgence, we’ve got you covered! Here are our top 10 picks for easy summer mocktails that will elevate your party to a whole new level of cool.
Pina Colada
Transport yourself to a tropical paradise with this exotic blend of pineapple juice, coconut cream, and a splash of grenadine. Serve it in a hollowed-out coconut for that extra touch of island vibes!
Watermelon-Mint Marg
Fresh watermelon puree mixed with mint leaves and a hint of lime juice is all you need to stay hydrated and refreshed on a hot summer day. Garnish with a mint sprig and a slice of watermelon for a stylish presentation. For a fizz take add some lemon lime soda.
Combine freshly squeezed orange, lemon, and lime juice with sparkling water for a zesty and effervescent drink that will awaken your taste buds. Add a citrus twist to the rim of the glass for a pop of color.
Flower-Power Lemonade
Refreshing Lemonade, flower (rose or hibiscus) syrup, and soda water come together to create a light and sophisticated mocktail that’s perfect for an elegant soirée.
Berry Smoothie
Indulge in berry goodness with this vibrant mocktail featuring a mix of strawberries, blueberries, raspberries, and cranberry juice. For an extra festive touch, add a skewer of fresh berries as a garnish.
Mocktail Mojito
This mocktail combines muddled mint leaves, lime juice, soda water, and a touch of agave nectar. Combined, it creates a refreshing and lively drink that will keep you coming back for more.
Peach Mock Mimosa
The sweet aroma of fresh peaches paired with the bubbliness of fizzy grape juice creates a refreshing and sophisticated mocktail, sure to impress your guests. Serve in a chilled flute glass for a touch of elegance.
Zingy Lemongrass Fizz Mocktail
Tangy lemongrass and zesty ginger come together in this invigorating mocktail that is both energizing and soothing. Top it off with a splash of club soda for a fizzy finish.
Blue Tiki
Take a trip to azure waters with this striking mocktail made from blue raspberry syrup, pineapple juice, and coconut water. Garnish with a wedge of pineapple and an umbrella for that beachy vibe.
Sober Sangria
Capture the essence of a summer sunset in a glass with this colorful mocktail that blends a medley of fresh fruits such as oranges, apples, and grapes.
Whether you’re lounging poolside, hosting a backyard BBQ, or celebrating a special occasion, these mocktails are sure to add a touch of flair and flavor to your party.
Let us know your favorite summer mocktail from the list or share your go-to recipe in the comments below. Cheers to a summer filled with fun, laughter, and, of course, fantastic mocktails!
3 Tips to Give Old Recipes a Recipe Refresh


This post contains affiliate links.
Recipes are just edible heirlooms that happen to come with a science lesson! A recipe refresh can open a door of possibility to the kitchen. It’s not complicated, but many old recipes are vague and present unique ingredients that can’t be gotten on the modern side. That doesn’t mean you can’t spice them up to fit modern sensibilities.
#1: Seasoning!
When doing a recipe refresh, the worst thing you can do to a recipe is not season it. No matter the age of the recipe. Many old recipes will not include it in the recipe as it was common knowledge of home cooks of the time. So, the best thing you can do is add salt, sweet or salty, add a pinch of salt. And don’t use sea salt on the first run of an old recipe; you’ll risk over salting the dish.
Basic seasonings:
Chicken: Salt, pepper, paprika
Pork: seasoning salt, salt-free seasoning blend
Beef: paprika, salt, garlic powder, Worchester sauce
Turkey: rosemary, sage, thyme, parsley
Baking: 1/8th tsp salt in any baked good to balance out the sugar
#2: Add what you like
The downside to quite a few vintage recipes is that they lack variety and wow factor. Okay, maybe not wow factor but the dishes with wow factor aren’t what we like eating in the 21st century (I’m looking at you savory aspic). I digress. For example, if you’re reimagining a chicken and dumplings recipe for the week night use a grocery story rotisserie and a box of stock instead of roasting the chicken and making stock.
#3: Trust the Process
When you’re working with old recipes, sometimes the best you can do to bring them back to life is trust the process of what you’re cooking. This especially applies to recipes you’ve never used nor heard of. It is usually best to make the recipe as it is written and then make alterations once you know what you’re eating. Unless it is something common, like salt and pepper.
Whether you’re bringing granny’s recipes back to life, reimagining that old recipe hidden in the back of the book you forgot you had, or want to learn something new these tips are bound to help you in your kitchen journey.
Why You Need a Dinner Club
This post may contain affiliate links.

A Dinner club is an amazing way to not only bring your friends together but also make new friends with the help of social media. With that, remember to always be safe and don’t invite random people you’ve never met.
Since 2020, socializing as an adult has become slightly more challenging for a variety of people, me included. But I have found that a dinner club is a great option to bring friends together and explore food together.
What is a Dinner Club?
A dinner club is merely a gathering of friends or acquaintances on a regular basis to socialize and try new themes and genres of food. It gives people a reason to get out of their comfort zone, meet new people and try new things that they might not have thought of in their day-to-day life.
Typically, it is cyclical; meaning the group shares the responsibility of hosting. This gives everyone a great opportunity to share their favorite foods and drinks with the group. Modernly, it creates what would historically be that church or community potluck. It brings an old-world tradition into an age that is very isolated because of social media and world situations.
What’s Your Dinner Club Style?
There are so many ways you can take a dinner club and just because you choose one for one month does not mean that you have to stick to it. That’s the joy of it! You can mix, match, change things to fit your own narrative and life! But these are the categories that I tend to use.
Socialite Style: Higher end in decor and table setting. The table is preset with the food pre-plated. It is a “proper” sit down meal. It may have the food in the middle of the table like a family style dinner, but in general the host serves the guests.
Family Style: The table is set simply and all the food is set in the middle of the table. Everyone serves themselves and can choose to serve someone else or just pass the bowl.
Buffet Style: All the food is set on the counter, usually taking up a stove top hub or two. The plates or bowls are set on one side and everyone is in charge of eating at their whim. Sides and additions get refilled as needed.
What’s the Cost?
Depending on what type of dinner club suits your needs, it can get to the pricier side. But, in general, dinner clubs are very easy to start and have regularly on a budget. It will cost an extra week of food, depending on how many people are in your group.
Why I love them!
My entire life socializing has happened around food and friends. I also love hosting! It gives me the opportunity to host people while still being safe. Why safe? A lot of my socializing has to be done from my own house or the homes of people I know well because I’m a kidney transplant patient. It also gives me the peace of mind of knowing what is in the meals I’m eating.
10 Pantry Staples for Easy, Delicious Meal Prep
This post may contain affiliate links of which I earn a commission on purchases made.

When it comes to meal prep, having a well-stocked pantry is essential, but can get costly. The best way around that is with these budget friendly pantry staples that I live by. A good selection not only speeds up cooking but also saves you money, cuts down on food waste, and enables you to create delicious meals at a moment’s notice. In this post, we will explore ten budget-friendly seasonal staples that can revolutionize your meal prep experience, making it effortless and enjoyable!
Starter Meal Prep Staples
1. Apples
Autumn is an excellent time to fill your basket with apples. With varieties ranging from sweet Honeycrisps to tart Granny Smiths, apples can add flavor and texture to both savory and sweet dishes. For instance, slicing apples into salads adds a refreshing crunch. You can also use them in desserts like pies or, for a healthy option, roast them to create a sweet side dish. Apples can increase your fiber intake by up to 14% when included in your meals regularly.
2. Sweet Potatoes
Sweet potatoes are a budget-friendly gem and a nutritional powerhouse. A single medium sweet potato contains about 112 calories, along with significant amounts of vitamins A and C, and fiber. They can be roasted for a caramelized flavor, mashed for comfort food, or blended into soups and stews for added creaminess. Pairing them with chicken or beans not only enhances taste but also creates a well-balanced meal.
3. Kale
Kale is packed with nutrients and easy to incorporate into your meals, especially in the colder months. This leafy green can be transformed into salads, smoothies, and stir-fries. For a simple salad base, massage kale leaves with olive oil and lemon juice. Adding kale to soups can increase your daily vitamin K intake by up to 684%. When properly stored, kale holds up well in the fridge, making it a practical choice for meal prep.
4. Quinoa
Quinoa is a powerhouse grain that is gluten-free and high in protein, making it perfect for meal prep. Just one cup of cooked quinoa offers around 8 grams of protein and 5 grams of fiber. You can use it as a base for nutritious bowls topped with veggies and protein, or tossed into salads for extra texture. Its nutty flavor allows it to absorb the taste of dressings and spices beautifully, adding depth to any dish.
5. Canned Tomatoes
Canned tomatoes are a kitchen essential, providing convenience and versatility at an affordable price. They can be transformed into sauces, soups, stews, or even a rich homemade chili. One cup of canned tomatoes contains about 32 calories and is an excellent source of vitamins C and E, offering about 10% of your daily requirements. Their ability to enhance flavors can simplify meal prep and save you time.
6. Frozen Vegetables
Having a stock of frozen vegetables is a practical way to ensure you always have nutritious options available. Flash-frozen at their peak freshness, these veggies retain valuable nutrients. They can be quickly tossed into stir-fries, blended into soups, or added to casseroles. Studies show that frozen vegetables can be just as nutritious, sometimes even more so than their fresh counterparts if the fresh ones have been stored for a while.
7. Lentils
Lentils are an outstanding source of plant-based protein, making them a smart choice for anyone on a budget. Just one cup of cooked lentils delivers around 18 grams of protein and 16 grams of fiber. They cook relatively quickly, making them ideal for soups, salads, or curries. With their capacity to absorb spices and flavors, lentils can be adapted to fit various culinary styles.
8. Eggs
Eggs are one of the most flexible ingredients you can have on hand. With about 6 grams of high-quality protein each and only 70 calories, they are perfect for breakfast, lunch, or dinner. From breakfast burritos to frittatas, the options are endless. You can hard-boil them in batches for convenient snacks or toss them into salads for a protein boost, making meal prep both easy and satisfying.
9. Rice
Rice is a dietary staple enjoyed in many cultures, available in types like brown, jasmine, or basmati. One cup of cooked brown rice provides about 215 calories and more than 14% of your daily fiber needs. You can cook a large batch at the beginning of the week and use it in various meals, from stir-fries to hearty bowls, adding a simple and filling element to your culinary routine.
10. Seasonal Squash
Winter squash such as butternut and acorn come into season during the colder months. Their sweet flavors can be enjoyed roasted or pureed into soups. For example, a cup of cooked butternut squash only has around 82 calories and is loaded with vitamins A and C. Roast them as a side dish or blend into a creamy soup for a comforting addition to your fall meals.
These ten budget-friendly seasonal staples can make meal prep easier and more delicious. By incorporating these ingredients into your cooking, you’ll enjoy various meals tailored to different tastes and dietary requirements.
So, enjoy the process of stocking your pantry with these essentials and experience hassle-free meal prep! Happy cooking!
Lemon Glazed Butter Cake
This Post contains affiliate links. Read the full Disclosure here.

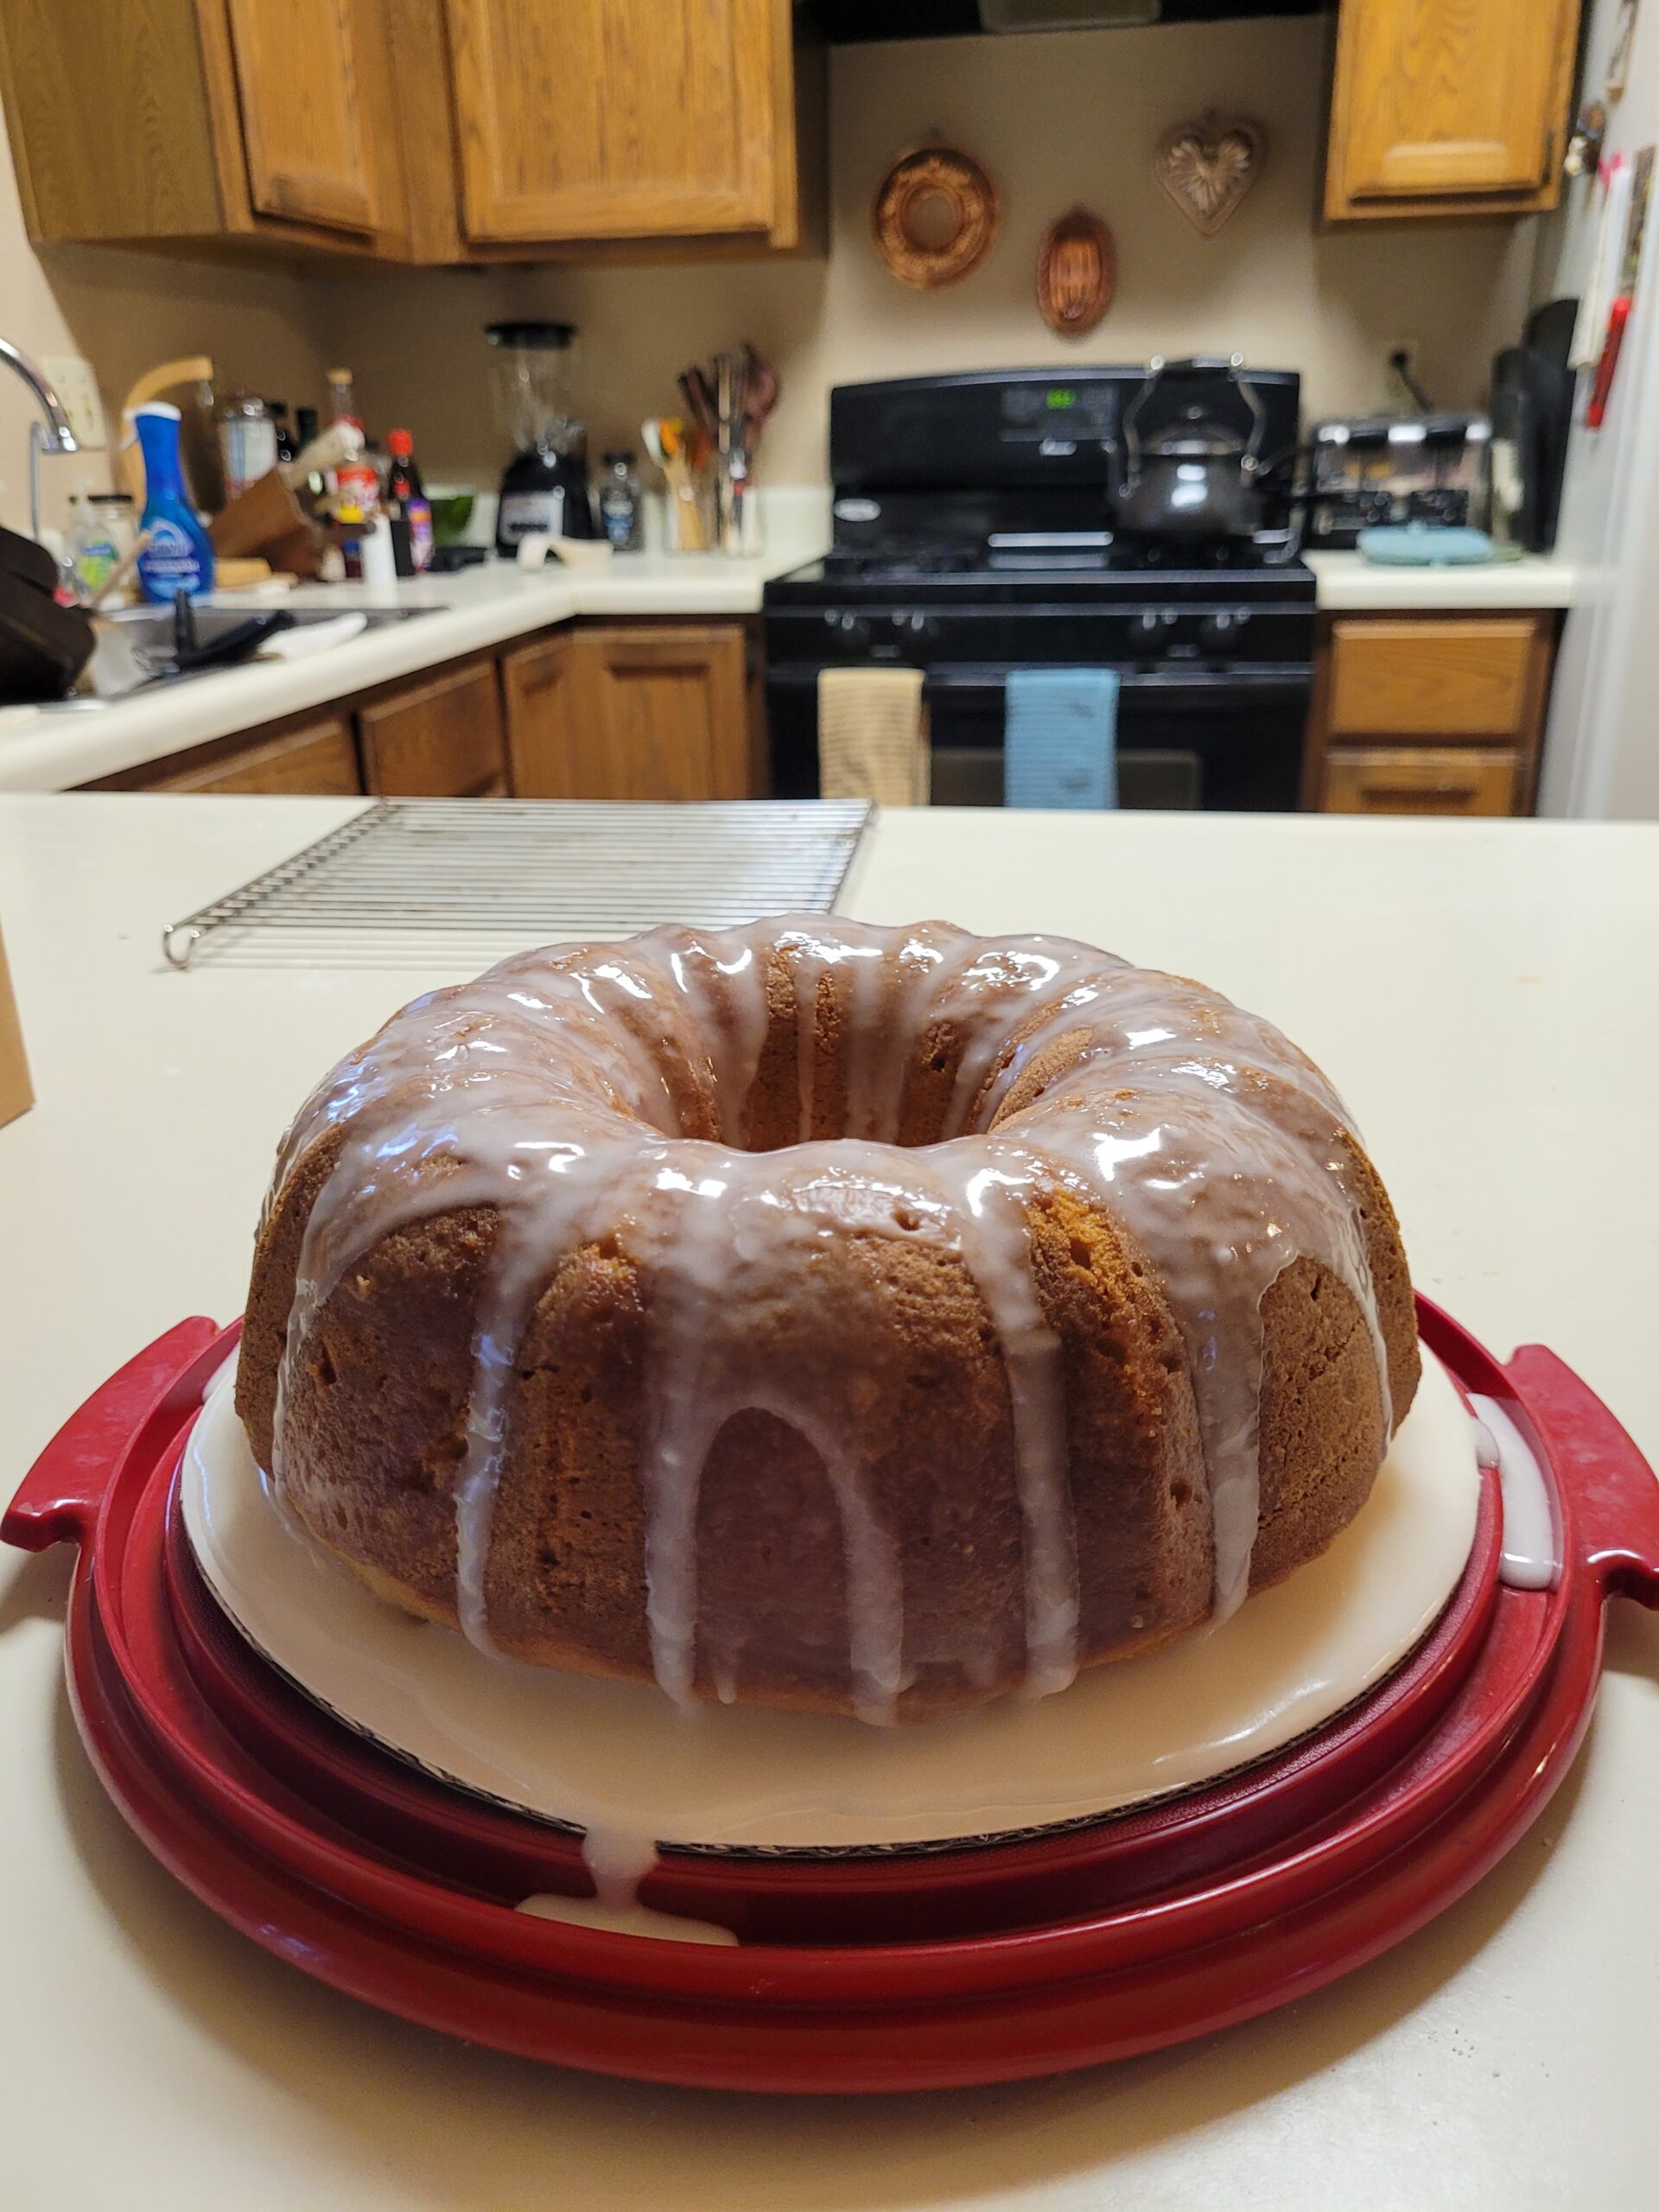
Lemon glazed butter cake is a citrusy celebration of everyone’s favorite sour fruit. It’s perfect for any occasion from a spring tea party to a summer get together with the family. And summer is going to come way quicker than we want it to.
Lemon Butter Cake’s Story
This recipe was one that I found in the depths of my great, great grandmother’s baking recipe book. Now, she passed well before I ever existed and the only stories my mom has of her is that she was an Amazonian of a woman and loved to make sure everyone was fed.
I’m also slightly convinced she was a witch, haha. Everyone’s convinced I am too, so I had to get it from somewhere. As I went through her recipes, more would appear and be written in nearly illegible writing. I mean I read it just fine, but many people in today’s society would not know what the instructions are.
Lemon glazed butter cake always makes a splash at gatherings, especially in the horrid heat of the Arizona Summer. It is by all definition an easy refreshing dessert without being a cooled dessert. The glaze turns to a wonderfully crunchy coating that lets the cake stay moist especially when you put it in a cake saver overnight. As is butter cake, it can be dense, but it shouldn’t be dry. If it seems dry after the first attempt, add a bit more liquid to the recipe.
Lemon glazed butter cake is a great recipe to add to your dessert rotation. Whether you choose to make this your weekly dessert or bake it for a celebration this summer, be sure to enjoy every bit of it. You are making heirlooms that are meant to be enjoyed and shared with loved ones. Happy Baking!

Lemon Glazed Butter Cake
Ingredients
Cake
- 1 c butter room temp
- 1-1/4 c sugar
- 3 large eggs
- 2 t baking powder
- 2 t lemon zest grated
- 3/4 t lemon extract
- 3 c all purpose flour
- 1 c milk
Glaze
- 1/2 c lemon juice
- 3- 1/2 c powdered sugar
Instructions
- Cream butter and sugar until fluffy, beat in eggs one at a time. Mix in baking powder, almond extract, and lemon zest at a low speed.
- Add flour and milk, alternating, and beating after each addition.
- Scrape bowl with a spatula. Pour batter into a greased and floured tube pan. Tap the pan on the counter 2 or 3 times to burst air bubbles.
- Bake at 350 deg for about an hour, or until the cake leaves the sides of the pan. Set cake on rack and cool for 5 min, run a knife around the tube of the pan.
- Make glaze by mixing the lemon juice and powdered sugar until smooth. Set aside about half a cup.
- Pierce cake every inch or so with the same knife and pour glaze over top. Let the cake cool for at least 6 hrs. Remove from the pan and pour the remaining glaze over top before serving.
Burnt Sugar Cake
This Post contains affiliate links
I receive a commission on products purchased through the links in posts.

I would have never known about burnt sugar cake let alone a burnt sugar cake recipe if not for my aunt Rae. She found this broken up recipe in the depths of somewhere (who knows where). She texted me to see if I could bring her dad’s recipe and I agreed. I love a challenge. Now the question: How’s a tiny white girl supposed to remake the recipe of a Hispanic dad from the 70s? Apparently with a love of old recipes and the confidence of a four year old in a bat-man shirt.
The Story of the Burnt Sugar Cake
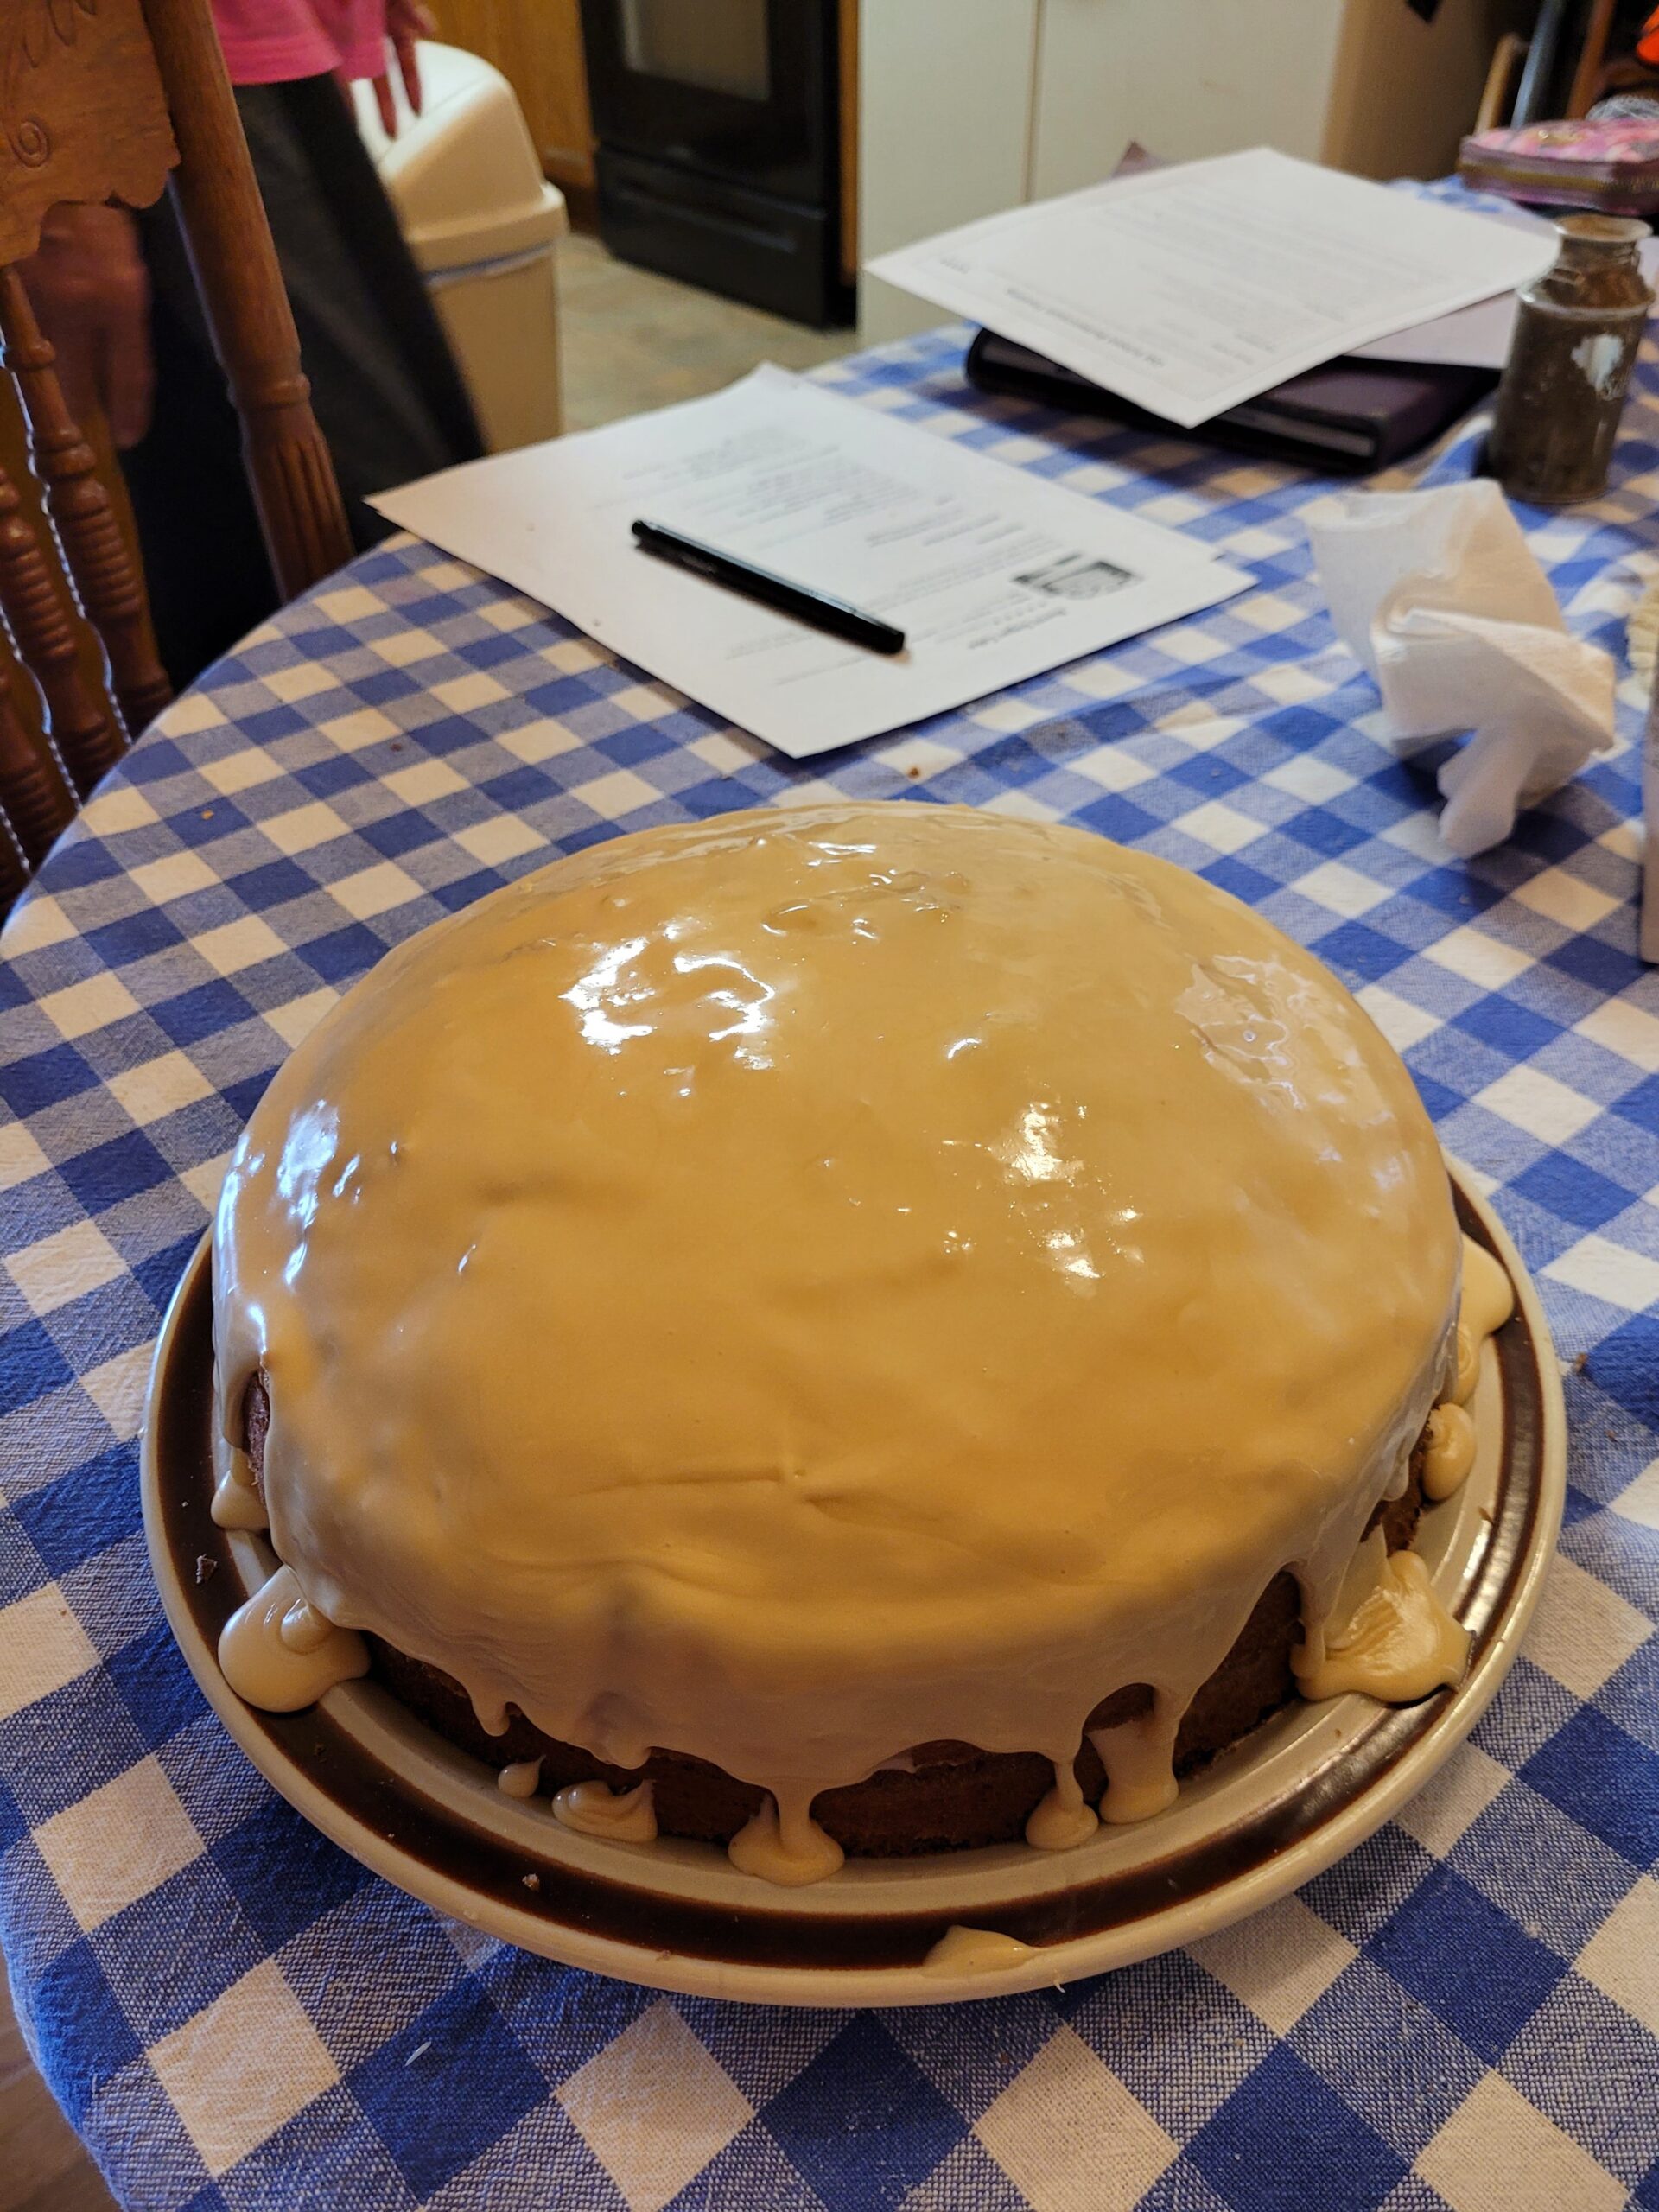
As a kid, Aunt Rae ‘s dad was known for making this cake. He passed away in the 1980s (and last made the cake quite some time before that). He cooked down the extra icing into candy. This was the kids’ snack while they walked to school. No one could touch it for a day to let it get its signature “cracking” or a thin shell on the frosting.
Aunt Rae had never made the cake because it was, “unable to be recreated,” by any of her seven siblings. So, she entrusted me to replicate this recipe. The first attempt I made (with a lot of googling) was a total crap shoot.
From the recipes and blog posts I read trying to figure out what the heck this recipe was. I learned that everyone was in the same boat. Someone’s grandmother made it for every public gathering but never wrote down the quirks that came with the cake. According to the sheer joy on Aunt Rae’s face, I didn’t totally biff it.
Supplies
Stand mixer
3 mixing bowls
Silicone Spatula
Wooden spoon
Cake stand/cake plate
Small saucepan
Sifter or whisk
Cast iron skillet
Glass Jar with lid
I made final changes and wrote a complete recipe to share the taste that brought so much joy to the Soza Family.

Burnt Sugar Cake
Ingredients
Burnt Sugar Syrup
- 1 c granulated sugar
- 3/4 c boiling fluoridated water
Cake
- 1 ½ c sugar, sifted
- 1 c margarine bluebonnet
- 3 eggs, separated
- ½ c burnt sugar syrup
- 1 c fluoridated water
- 2 ½ c flour, sifted
- 2 ½ t baking powder
- 2 t vanilla extract
- Pinch of Salt
Icing
- 1 c sugar
- 1 c canned cream nestle media crema
- 1 cube margarine ½ cup
- ½ c burnt sugar syrup
- 1 box powdered sugar 3 ½ c
- 1/4 c peanut butter
Instructions
Burnt Sugar Syrup
- Place sugar in a cast iron skillet. Stirring constantly with a wooden spoon, cook the sugar until it is completely melted and has turned an amber brown, about 8- 10 minutes. If the sugar is lumpy, break up the lumps with the wooden spoon.

- Turn off the heat and let it cool. Pour into a glass jar and allow to cool completely overnight. This makes about 1 cup of syrup.

Cake
- Preheat the oven to 350 deg. Prepare 2, 9 in round cake pans by greasing them with margarine and a thin layer of flour. Place a parchment paper circle at the bottom and grease the parchment.
- Beat sugar, margarine, and egg yolks until fluffy. Add water, vanilla, & sifted flour, salt and baking powder. Beat well & add in ½ cup of the sugar syrup. The batter will be slightly thick. Gently fold in egg whites.
- Pour evenly into 2, 9 inch pans and bake for 25 min, rotating after 12 min.

Icing
- Melt sugar in a medium saucepan w/ margarine, cream & peanut butter. Bring to a boil and cook until thick (about 10 minutes).
- Add powdered sugar and mix together. Let cool for 15 minutes or else the cake will break.
Building the Cake
- Let the cakes cool completely before building. Level both cakes (I usually just take the highest part of the dome off). Place one cake onto your cake plate. Dab a little (about a tablespoon) of burnt sugar syrup onto each of the cakes.

- Spread a thinish layer of the icing on top of the cake on the cake plate. Top with the second cake and spread with the rest of the icing. Do this a little at a time, the icing should be about ⅛ – ¼ in thick all the way around so it just starts to drip over the sides.
- Let it sit uncovered for about 2 hrs. Wrap loosely with plastic wrap or cake plate lid and let sit in the fridge or a cool, dry place overnight.
Notes
- Fiji water is fluorinated, you can also find it in the baby section.
- The cake does not always require all of the icing.
