Get Ya’ Drunk Fruitcake
This drunk fruitcake is the most polarizing Christmas cake in my family. No joke. The only two people who ate it were my Pop-pop and the dad-man. All the dad-man’s sisters hate it. Hated that Pop-pop made it. All because it smelt so bad. Well, it’s got two full bottles of brandy and a month of sitting under its belt. It’s not going to smell like an apple simmer pot.
This recipe took multiple phone calls to three of my aunts and one very confusing interview with my mom-mom Diane. From which I learned that Pop-pop just used a boxed cake and put random spices in it and hid the rest of the baking sins in Brandy. Now, in my defense, I have never made this recipe to its full potency. Mostly out of fear.
To quote my aunt who got the recipe from mom-mom, “It’s pound cake Diane; you just season it. Then get it drunk.” Which isn’t exactly a recipe, but that’s how pop-pop would explain drunk fruitcake to anyone who would ask.
Get Ya’ Drunk Fruitcake
Equipment
- 2-3 loaf pans
- glass bowl w/ lid
- Stand mixer
- Measuring spoons
- Measuring cups
Ingredients
- 1 box pound cake mix
- 1 bottle brandy
- 2 eggs
- 1/4 c butter
- 1 t ground cinnamon
- 1 tsp ground ginger
- 1/2 t ground mace
- 1/2 t ground allspice
- 1/4 c Candied ginger
- 1/2 c Candied pineapple
- 3/4 c Candied cherries
- 1/2 c Raisins
Instructions
- Put fruit into a sealable glass bowl and pour 3/4 c to 1 c brandy over the fruit. Give it a good mix and let sit for at least 24 hours.
- Make the cake according to the box, adding in the cinnamon, ginger, mace, and allspice and replacing the water with the brandy. Fold in the candied fruits and brandy that didn’t soak in.
- Bake according to the back of the box for the appropriate pan.
- While still warm, drizzle with 1/4 c of Brandy. After they’ve cooled, wrap them in cheese cloth and liberally soak them in brandy. Place the loaves into an airtight storage container and store in a cool, dry place. Soak wrapped fruit cakes every few days for at least 3 weeks before serving.
Notes
Nothing says merry Christmas like big bottles of booze and saturating a cake in it. All jokes aside, this drunk fruitcake is not for the weak, or lightweight. I don’t personally drink and therefore do not make this cake every year. You can find my go-to fruitcake recipe here, the petite fruitcake. Or my rum fruitcake.
Puppy Chow Snack Mix
Puppy chow, muddy buddies, monkey munch. Whatever you call it, it is bound to be a hit. A sweet snack mix made with chex cereal, chocolate and peanut butter. And… if you’re me, a few extra sweet surprises in the form of candy coated chocolates.
This is by no means a secret family recipe. One year, I prepared it from the back of a Chex cereal box, and my aunt got hooked on it. Now, I’m contractually obligated to make it every Christmas for her. Only minor inconvenience of that is the fact she now lives across the country. So? I ship a gallon of this stuff to her in the south every year along with her yearly dose of canned Hatch green chile peppers.
Puppy Chow
Equipment
- Extra large mixing bowl
- sturdy spatula or wooden spoon
- 1 qt Microwave safe bowl
- Measuring spoons
- Measuring cups
- 2-3 gallon bags
Ingredients
- 1 box Chex cereal 9-10 cups
- 1/4 cup butter
- 1-1/4 cup Semi-sweet chocolate chips
- 1/2 cup peanut butter
- 1 teaspoon vanilla extract
- 2 cups powdered sugar
Instructions
- Pour cereal into the large bowl, set aside.
- In a quart microwavable bowl, microwave chocolate chips, peanut butter, and butter uncovered in 30 second increments until it can be stirred smooth. Stir in vanilla.
- Pour Mixture over cereal, stirring until evenly coated.
- Pour a quarter of the powdered sugar into each gallon bag. Transfer coated cereal equally into each bag. Pour rest between each bag.
- Seal bags and shake until well coated. Open bags and leave to dry out for 24-48 hours.
Notes
No Fuss Baby Food Carrot Cake
Despite the name, this carrot cake is a constant crowd pleaser. Yes. It does have baby food in it. I promise no matter how weird it might sound; it is the secret to the sponginess of this cake. The one thing you will not find with this cake is frosting. That is simply because my dad is not a cream cheese or buttercream frosting person. He likes a simple, but ample, dusting of powdered sugar over the top.
The tweaks we have made to this recipe have happened by accident and it took about three years to figure out what my dad and I were doing wrong that made it taste so good. The answer was we added a bit too much oil to the batter, especially when the dad-man was left to his own devices to make the cake.

Carrot Cake
Equipment
- 12 c Bundt Pan
- Stand mixer with paddle attachment
- wire cooling rack
- Measuring cups
- Measuring spoons
- Spatula
Ingredients
- 3 c flour
- 2 c granulated sugar
- 1 c vegetable oil + 1T
- 4 eggs
- 8 oz carrot junior baby food
- 1/2 t salt
- 2 t baking soda
- 2 t ground cinnamon
- 1 t allspice
- 1 t vanilla
- Powdered sugar
- 3 c flour
- 2 c granulated sugar
- 1 c vegetable oil + 1T
- 4 eggs
- 8 oz carrot junior baby food
- 1/2 t salt
- 2 t baking soda
- 2 t ground cinnamon
- 1 t allspice
- 1 t vanilla
- Powdered sugar
Instructions
- Grease and flour a large tube pan. Preheat the oven to 350 deg. Sift flour, salt, baking soda, and spices into a large bowl.
- Beat granulated sugar, eggs, vanilla and oil until it is light and fluffy. Add baby food and mix thoroughly. Add dry ingredients one third at a time, mix until smooth. Pour into pan.
- Bake 30-35 min or until a toothpick comes out clean. Turn out cake onto a wire rack. Dust with powdered sugar while warm and let cool.
If you decide to put frosting on to your cake, this is my go-to buttercream frosting.
German Chocolate Cupcakes
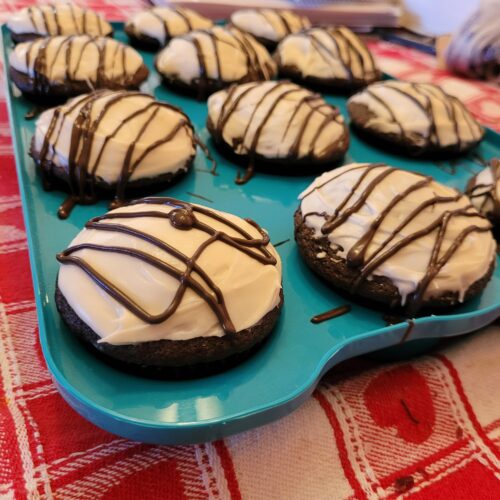
German chocolate cake is a favorite in my family because we aren’t huge fans of super sweet desserts. These German chocolate cupcakes are the perfect solution for that after dinner need for dessert without giving yourself the unpleasant feeling of eating too much sugar.
Before I received this recipe, I would make a black forest cake recipe without the frosting because the dad-man doesn’t like frosting. Instead, I would make cherry compote and top the slices of cake with that and whipped cream. As strange as it sounds, it takes more work to put that cake together than the cupcakes. I have tried to turn that cake into cupcakes and they just turn out tough. Now, that could be baker’s error, but this recipe I’m showing you is made to be cupcakes.

This particular recipe comes from family friends, John and Tonja. The recipe dates back to the 1800s and was brought to America from Germany by John’s great grandmother when she migrated here. It is an honor for me to have a family recipe like this from people I consider family, but not by blood. These cupcakes are a perfect example of the bond that food can help form in a community.
These German Chocolate cupcakes are a simple, delicious treat perfect for your next potluck or to simply end your Sunday meal. They taste best if you keep them in the refrigerator until you want to eat them. I also added a dark chocolate drizzle to the top for some added decoration. When you try out this recipe, like any recipe, I highly recommend making it as written first and then changing things to fit you and your family’s tastes.

German Chocolate Cupcakes
Ingredients
Cake
- 1 egg
- 1/2 c cocoa powder
- 1/2 c butter
- 1/2 c sour milk
- 1 t baking soda
- 1 c sugar
- 1 1/2 c flour
- 1 t vanilla
- 1/2 c boiling water
Frosting
- 1 T butter, softened
- 1 c confectioner’s sugar
- 1 t vanilla extract
- Carnation evaporated milk
Instructions
- Place baking soda into sour milk (2 t vinegar in at least 2% milk), stir to dissolve. Combine all ingredients except boiling water and stir. Add boiling water and stir. Pour into lined cupcake tins. Bake at 350 degrees for 18-20 minutes. Makes 12 cupcakes.
- Melt butter and mix in vanilla. Add to the confectioners’ sugar. Add food coloring for added fun. Add milk one tablespoon at a time until it’s a spreadable consistency.
Butterfinger Cake
This post contains affiliate links where I earn a commission on purchases.
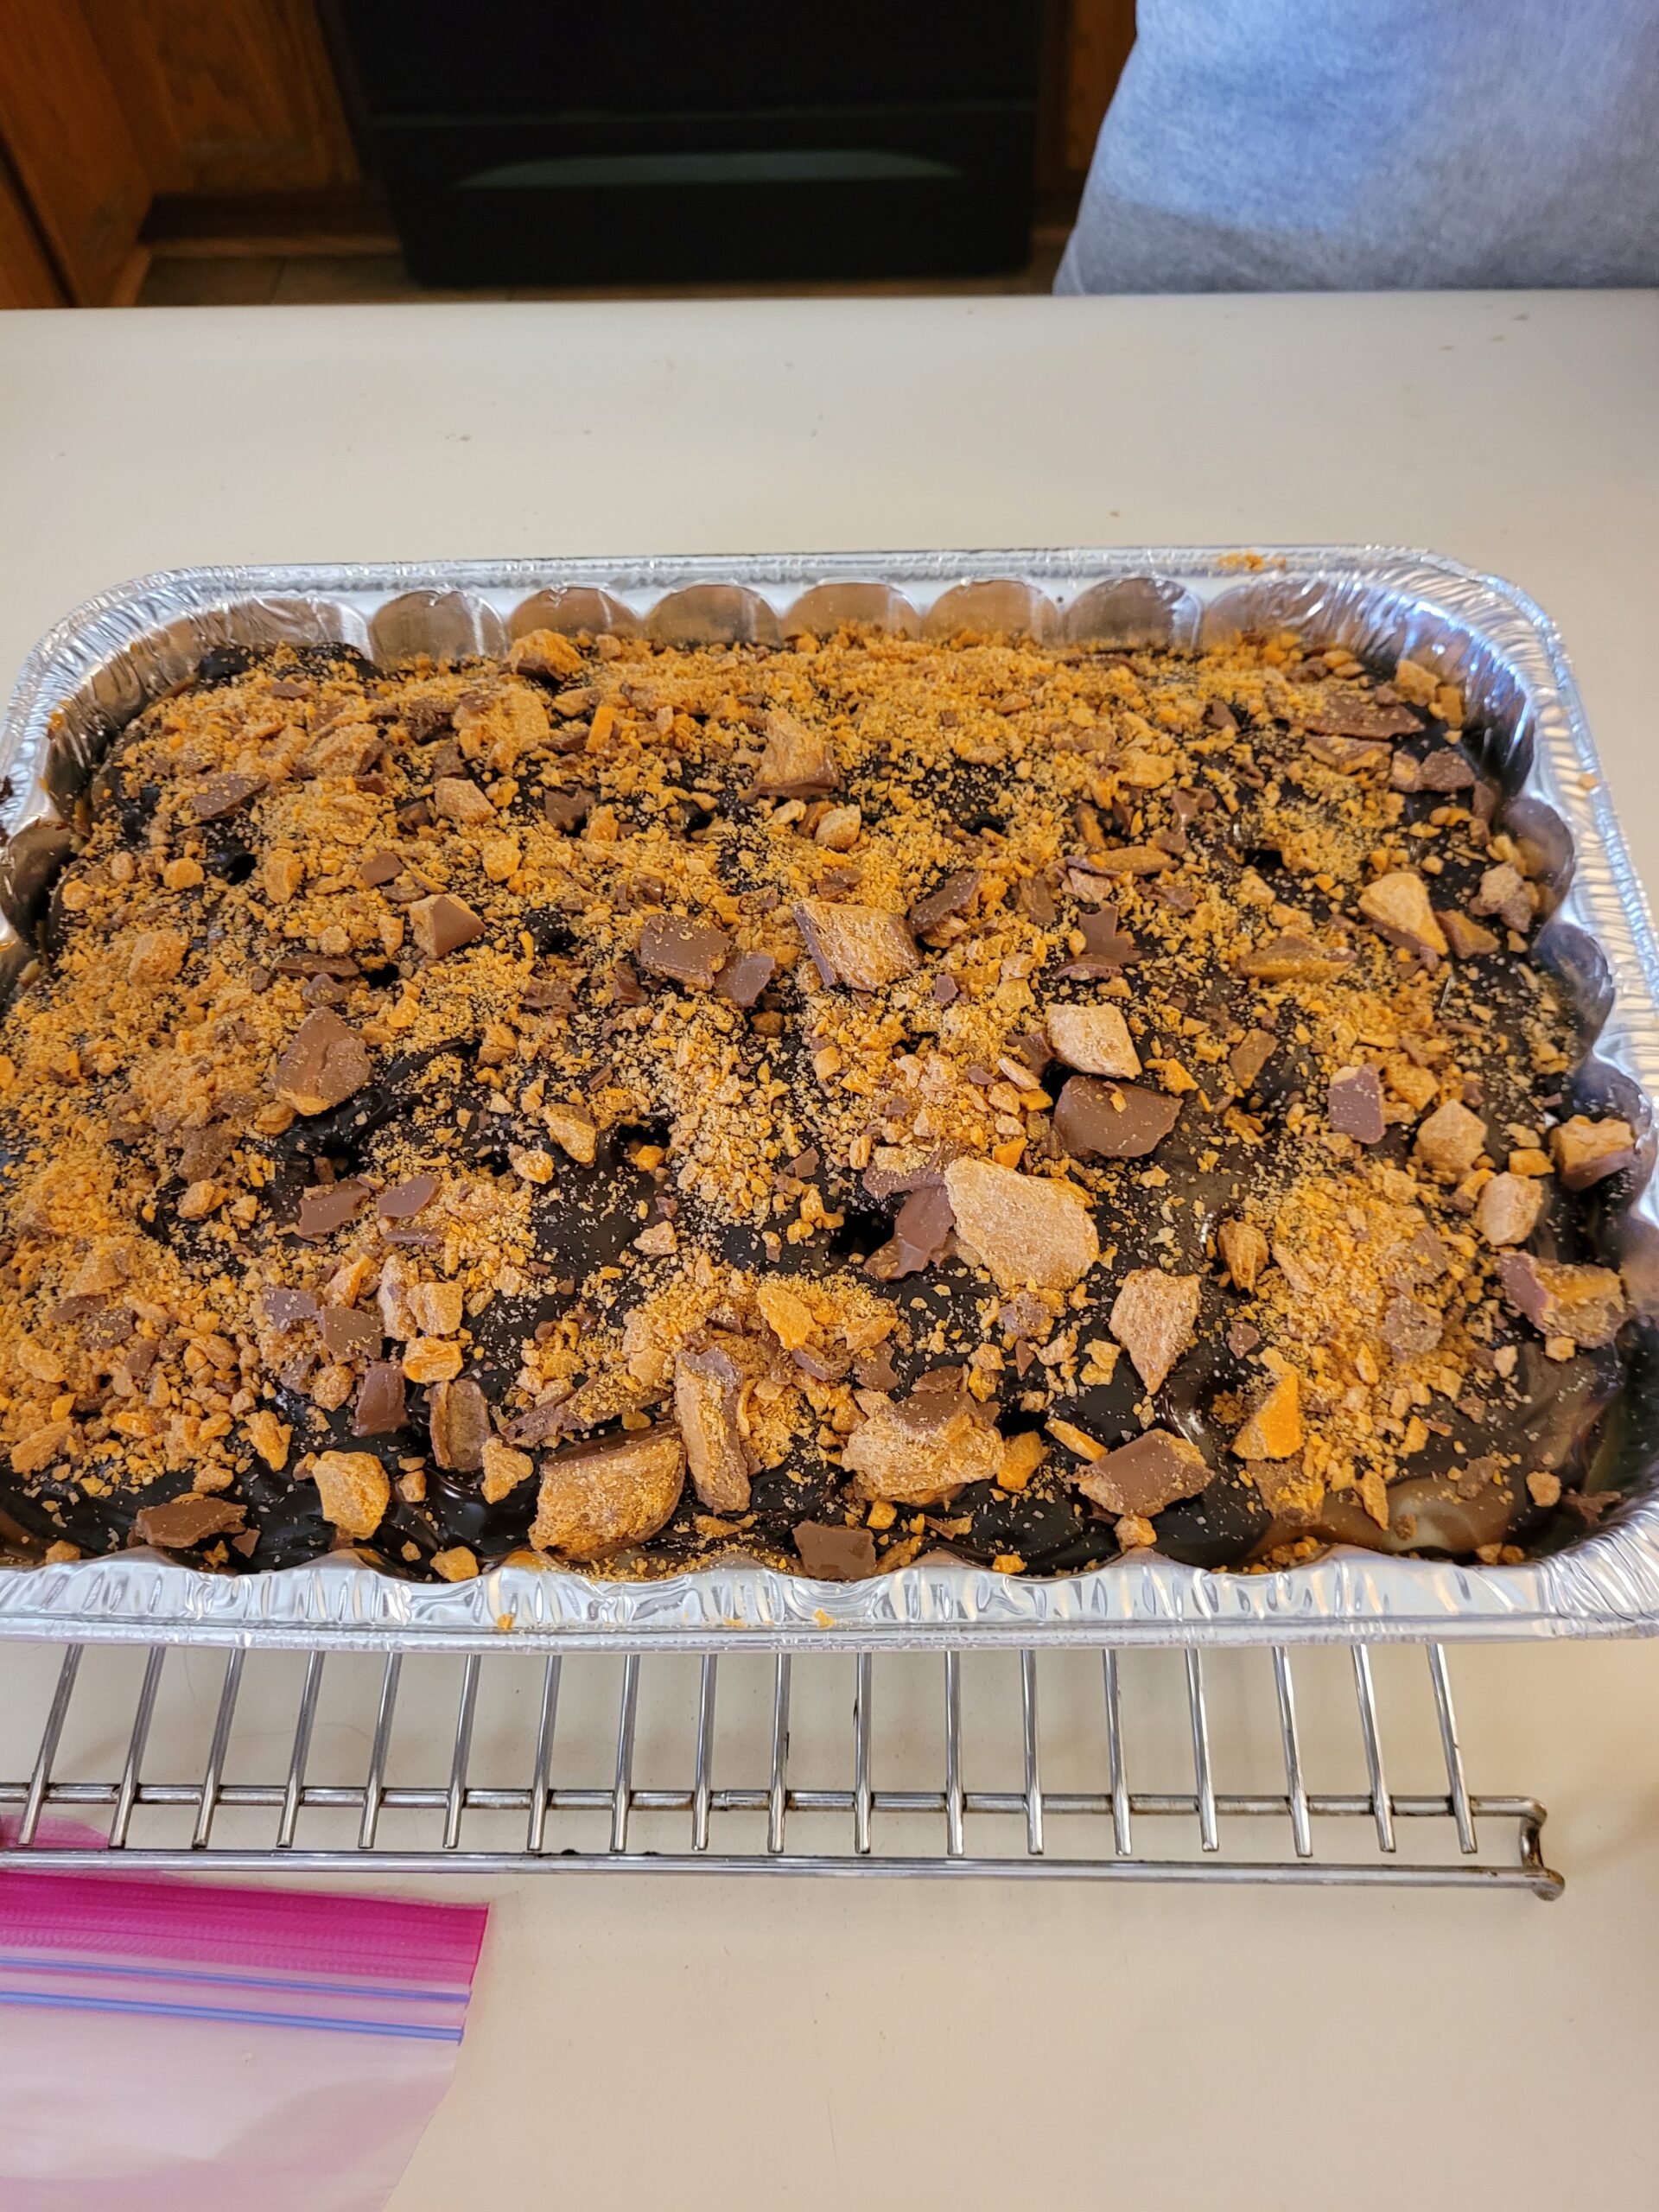
Butterfinger cake is one of those desserts that makes you gain weight by just looking at it. We usually only make this rich and decadent dessert in the summer. Why? There is a pool, slip-n-slide, or sprinkler nearby because, oof, you’ll need to work it off after just a small piece. That being said, everything in moderation. You can’t go into eating this cake with the assumption that you’ll be able to eat a regular sized slice. It serves roughly 30, cut into two-inch squares. It is that rich.
I don’t know exactly where this recipe came from, but I just remember it showing up at every school function with a cakewalk or potluck put on by the PTA of my elementary school. Or even the yearly carnival they had at the school to celebrate the summer break.
While I was in elementary school the room parents (mostly moms), made cookbooks at the holidays out of written recipes and traditions that the students would bring in. Low and behold that recipe made it into at least one of the two books that got made. I highly doubt that room parents, let alone whole class projects are a thing. But it is a fun memory that I treasure through cookbooks my mom kept.
Butterfinger cake is best made in a foil pan that you can recycle or chuck in the bin after the cake is gone. Trust me. I’ve tried to clean a glass pan after the fact and the combo of caramel, sweetened condensed milk, and butter finger does not come off easily from a glass pan.
Whether you’re make this for a school, church or random get together it is sure to make waves. It doesn’t matter if you’re familiar with such events, this cake is always a crowd pleaser. Don’t forget to share recipes whenever you can and keep tradition alive.

Butterfinger Cake
Ingredients
- 1 box Butter recipe chocolate cake mix Duncan hines
- 1 can sweetened condensed milk Eagle brand
- 1 jar caramel sauce
- 1 jar hot fudge sauce
- 1 tub cool whip
- 1 bag butter finger bits or 4 full size Butterfinger bars
Instructions
- Make and bake the cake as directed on the box. Let cool for 5 minutes.
- While warm, punch holes in the cake with the back of a wooden spoon. Pour the can of sweetened condensed milk over the cake, followed by the caramel and hot fudge. You may have to heat the hot fudge to get it to pour properly. Pour ⅓ to ½ the bag of butterfinger bits over the cake (or two crumbled butterfinger bars).
- Cool for at least four hours. Overnight is better. Pre-cut cake into 18-24 pieces for easier serving.
- Top the cake with the tub of Cool Whip and another ⅓ to ½ of the Butterfinger bits (or other two crumbled Butterfinger bars).
- Serve cool.
Notes
- Cake is best made a day ahead. Keep it in the fridge.
- Yellow cake works just as well.
- I recommend cutting the cake into 2 inch squares in the pan before adding the cool whip for easier serving.
Lemon Glazed Butter Cake
This Post contains affiliate links. Read the full Disclosure here.

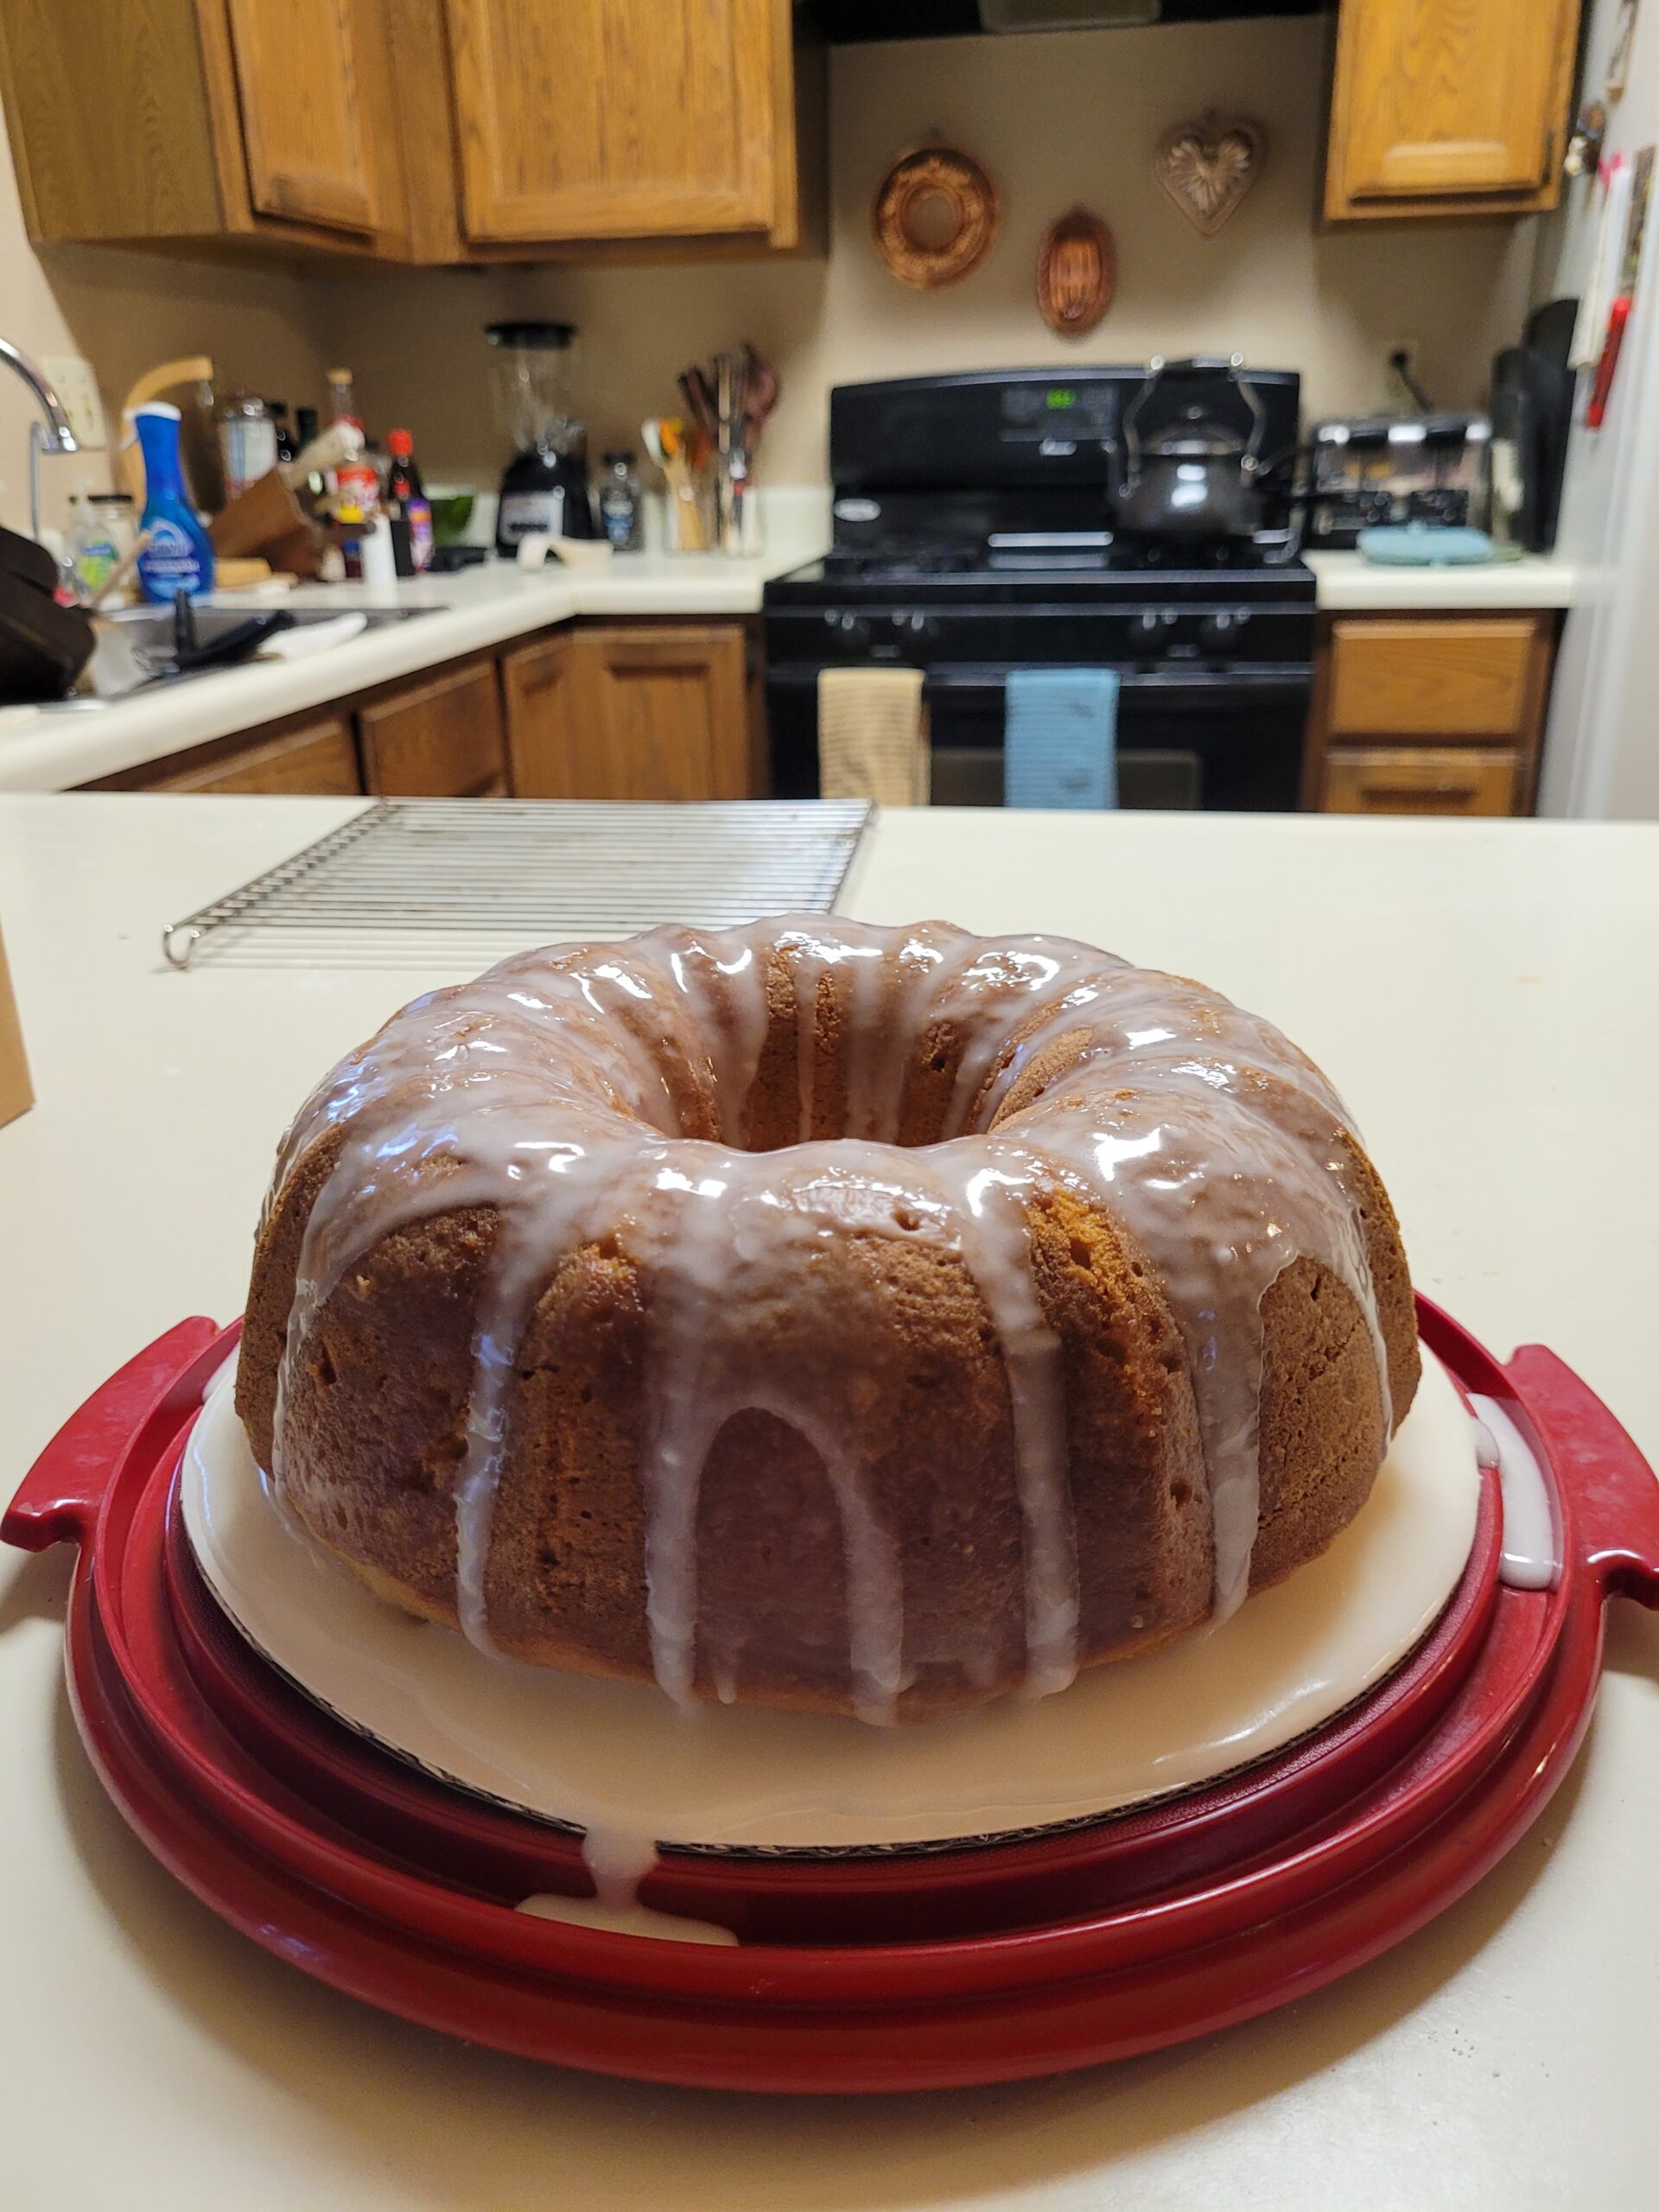
Lemon glazed butter cake is a citrusy celebration of everyone’s favorite sour fruit. It’s perfect for any occasion from a spring tea party to a summer get together with the family. And summer is going to come way quicker than we want it to.
Lemon Butter Cake’s Story
This recipe was one that I found in the depths of my great, great grandmother’s baking recipe book. Now, she passed well before I ever existed and the only stories my mom has of her is that she was an Amazonian of a woman and loved to make sure everyone was fed.
I’m also slightly convinced she was a witch, haha. Everyone’s convinced I am too, so I had to get it from somewhere. As I went through her recipes, more would appear and be written in nearly illegible writing. I mean I read it just fine, but many people in today’s society would not know what the instructions are.
Lemon glazed butter cake always makes a splash at gatherings, especially in the horrid heat of the Arizona Summer. It is by all definition an easy refreshing dessert without being a cooled dessert. The glaze turns to a wonderfully crunchy coating that lets the cake stay moist especially when you put it in a cake saver overnight. As is butter cake, it can be dense, but it shouldn’t be dry. If it seems dry after the first attempt, add a bit more liquid to the recipe.
Lemon glazed butter cake is a great recipe to add to your dessert rotation. Whether you choose to make this your weekly dessert or bake it for a celebration this summer, be sure to enjoy every bit of it. You are making heirlooms that are meant to be enjoyed and shared with loved ones. Happy Baking!

Lemon Glazed Butter Cake
Ingredients
Cake
- 1 c butter room temp
- 1-1/4 c sugar
- 3 large eggs
- 2 t baking powder
- 2 t lemon zest grated
- 3/4 t lemon extract
- 3 c all purpose flour
- 1 c milk
Glaze
- 1/2 c lemon juice
- 3- 1/2 c powdered sugar
Instructions
- Cream butter and sugar until fluffy, beat in eggs one at a time. Mix in baking powder, almond extract, and lemon zest at a low speed.
- Add flour and milk, alternating, and beating after each addition.
- Scrape bowl with a spatula. Pour batter into a greased and floured tube pan. Tap the pan on the counter 2 or 3 times to burst air bubbles.
- Bake at 350 deg for about an hour, or until the cake leaves the sides of the pan. Set cake on rack and cool for 5 min, run a knife around the tube of the pan.
- Make glaze by mixing the lemon juice and powdered sugar until smooth. Set aside about half a cup.
- Pierce cake every inch or so with the same knife and pour glaze over top. Let the cake cool for at least 6 hrs. Remove from the pan and pour the remaining glaze over top before serving.
Old-Fashioned Strawberry Cake
This post contains affiliate links where I earn a commission on purchases.
Cake is a pivotal part of any birthday celebration! However, I am not the type to use a box of strawberry cake mix (I don’t like the flavor). Even if it’s not my birthday I’m baking for, and let’s be honest it rarely is, I like to make people cakes that they will actually like… without the strange flavored extract powders.
This recipe came from a need for a strawberry cake for someone who claimed not to like fresh strawberries. Yeah, it didn’t make sense to me either. But a family member wanted to take it in for a co-worker, so that’s what they got. So, naturally, I took to the internet to research and all I came back with was many older recipes for white cake with strawberries on top.
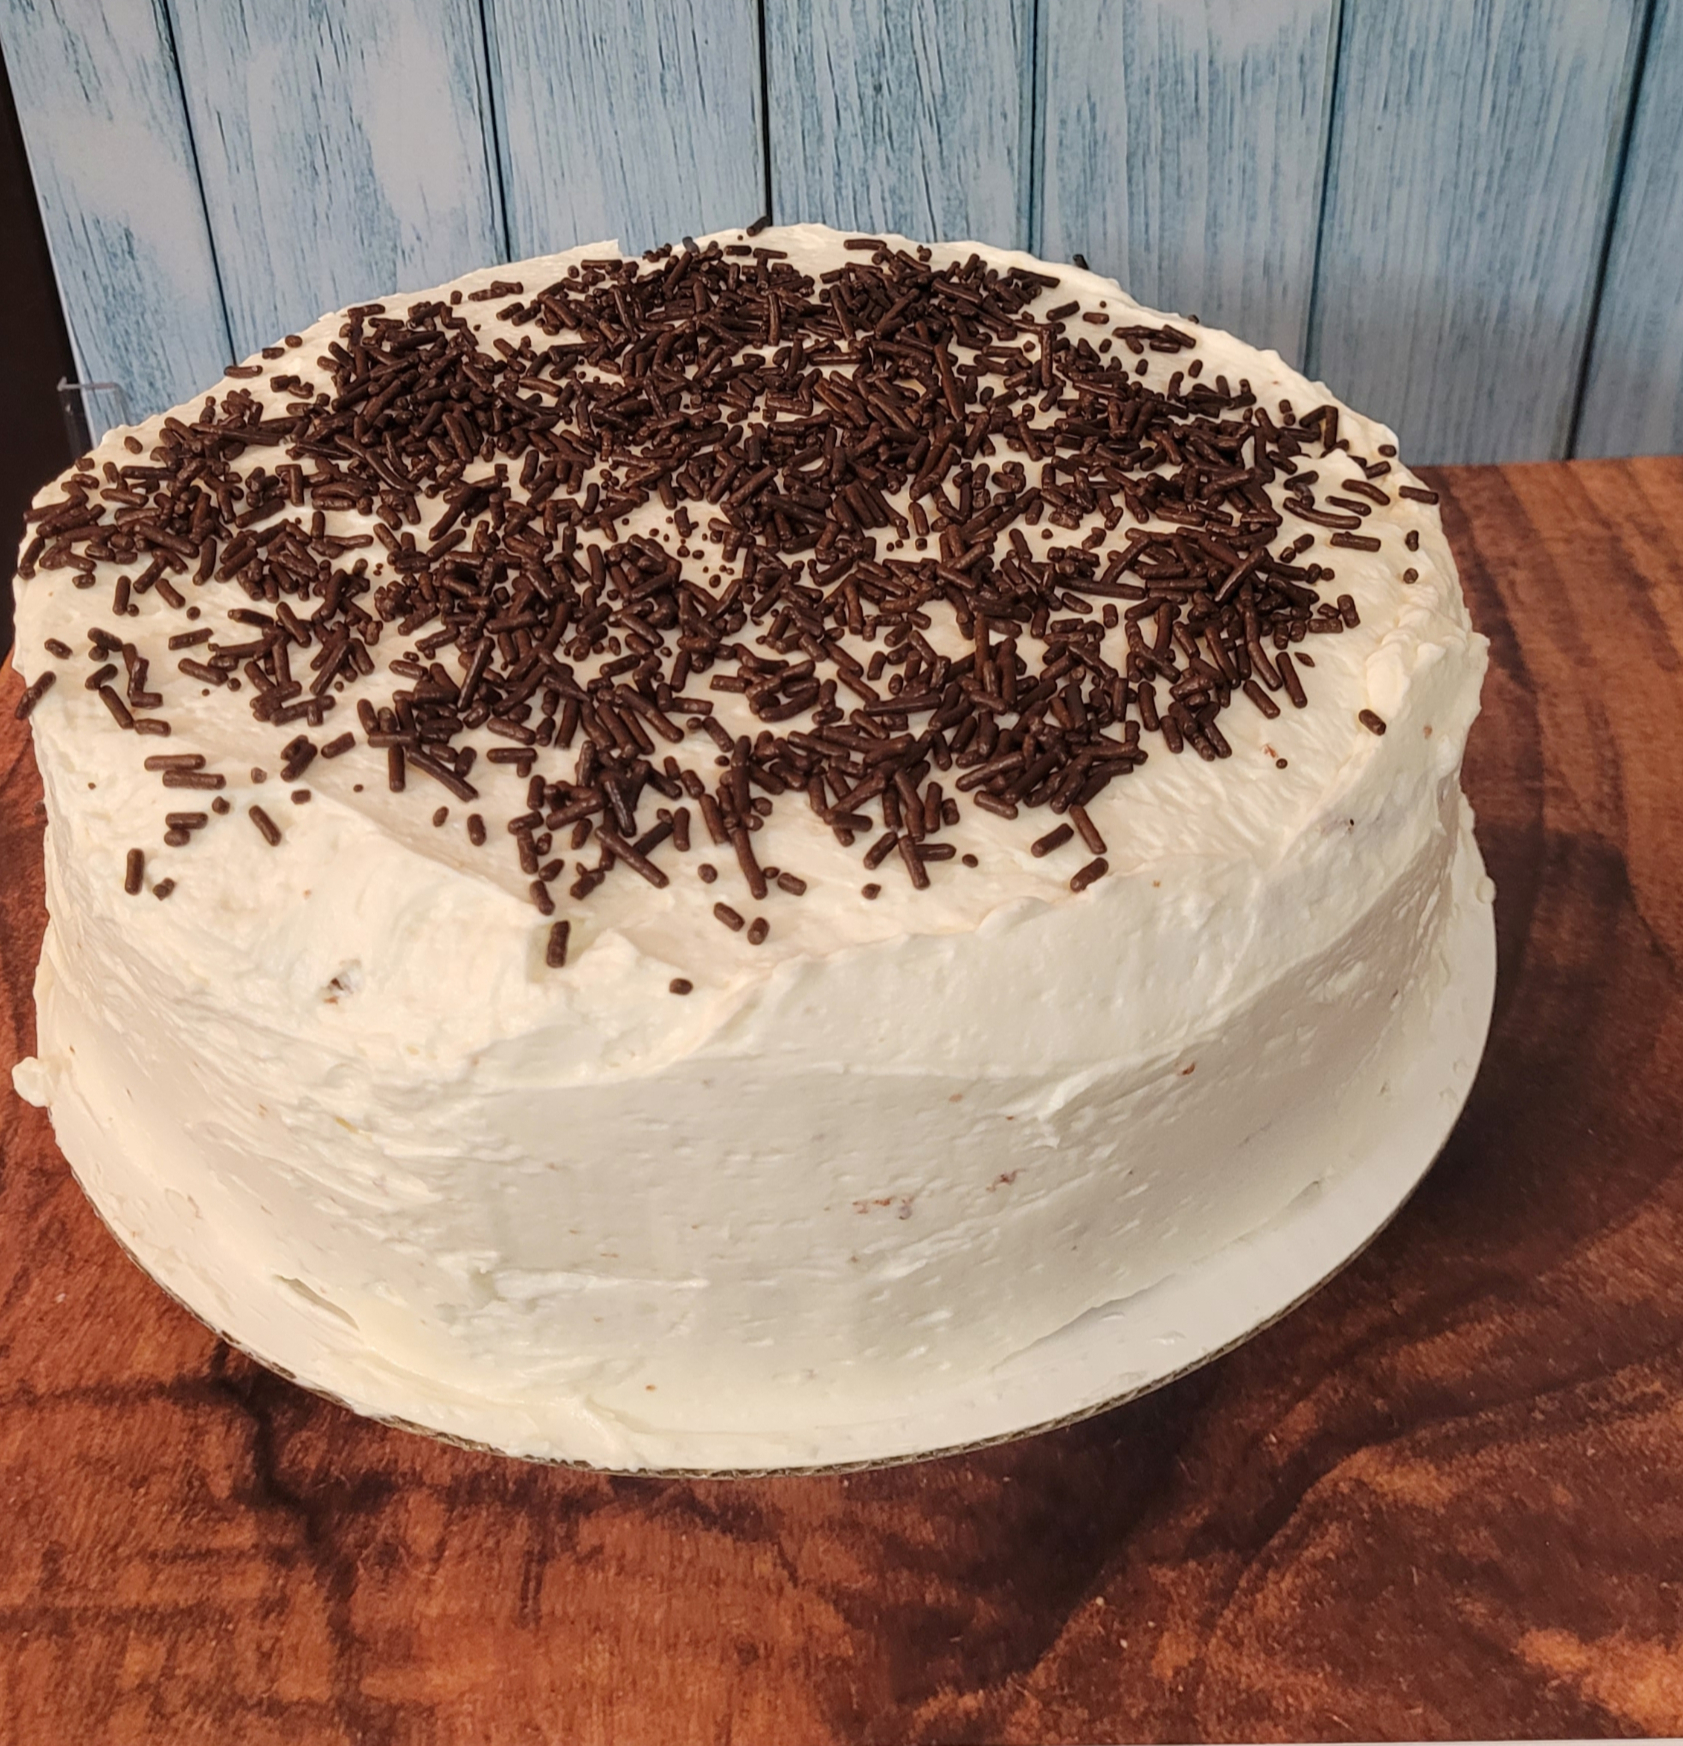
Instead of doing that, I made a puree and used it as the food coloring and part of the liquid for the cake. With the birthday co-worker not liking fresh strawberries a fruit topping was out of the question. But you know what they did like? Chocolate jimmies. So, it got filled with buttercream frosting and chocolate jimmies.
This old-fashioned strawberry cake is perfect for any occasion! It takes the cake over a box mix or store-bought cake as far as flavor goes. So, make this cake for your next special occasion; or any day of the week to celebrate you. Happy Baking!

Old-Fashioned Strawberry Cake
Ingredients
Cake
- 2 sticks unsalted butter softened
- 1-1/2 cups sugar
- 2 whole eggs room temperature
- 1 egg white room temperature
- 1 teaspoon pure vanilla extract
- 2 cups all-purpose flour
- 2-1/2 teaspoons baking powder
- 1 teaspoon baking soda
- 1/4 teaspoon salt
- 1 cup milk
- 2-1/2 pounds fresh strawberries
Frosting
- 2 sticks unsalted butter softened
- 1 brick cream cheese 8-ounce, softened
- 9 cups confectioners’ sugar
- 2 tablespoons milk
- 4 tablespoons strawberry puree
Instructions
- Make the strawberry puree: Rinse the strawberries, remove the stems and roughly chop them. Puree the strawberries in a food processor until smooth. Once pureed, there should be about 2-1/2 cups of liquid. Transfer the strawberry puree into a small saucepan. Turn the heat on the stovetop to low and allow the puree to simmer, stirring occasionally, for 30 minutes until reduced. Transfer the reduction to a bowl and chill it in the fridge until completely cool.
- Prep the cake pans: Preheat the oven to 350°F. Grease two 8-inch round cake pans with cooking spray or butter. Cut out a circular piece of parchment paper to place in the bottom of each pan to prevent sticking.
- Make the strawberry cake batter: In a mixing bowl, combine the flour, baking powder, baking soda and salt. Whisk until smooth and set aside.
- Cream the softened butter and sugar until light and fluffy. (This is how to cream butter and sugar.) Mix in the two whole eggs and one egg white, along with the vanilla extract.
- Mix in 1/3 of the flour mixture, then add half of the milk. Add in another 1/3 of the flour mixture, the remaining milk and then the remaining flour mixture. Stir in 1 cup of strawberry puree, leaving the remaining puree for the frosting.
- Mix in red gel food coloring, if a stronger pink color is desired.
- Bake the cakes: Divide the batter between the two prepared cake pans. Bake the cakes for 25 minutes, until a toothpick inserted in the middle comes out clean. Once baked, remove the cakes from the oven. Allow the cakes to cool for 20 minutes before removing them from the cake pans. Set aside on a cooling rack to cool completely.
- Make the strawberry frosting: Cream the softened butter and cream cheese until well combined and fluffy. Mix in 2 cups of confectioners’ sugar, along with 2 tablespoons of milk. Continue to mix in the powdered sugar, alternating with the strawberry puree. Scrape the sides of the bowl with a spatula as needed. With all of the powdered sugar added and the frosting coming together, turn the speed up on the mixture to whip until fluffy.
- Assemble your strawberry cake: Place one cooled cake round on a cake stand or plate. Spread frosting over the cake round and then place the second cake round on top. Frost the rest of the cake with the strawberry frosting, covering the sides and top. Garnish with fresh strawberries, if desired.
Graham Cracker Crust Cheesecake
This post contains affiliate links where I earn a commission on purchases.
Cheesecake is huge in my family; graham cracker crust cheesecake is slightly lower on the list. My parents are from New Jersey; most of my family is still on the East Coast. They know cheesecake. This is the easiest cheesecake my family has.
There’s no fancy story with this one, just the years of tweaking to find a recipe with a crust that didn’t turn to a gross brick when it set. To my memory, I mixed together a bunch of recipes that I found and baked them in different combinations until I found one that worked.
May I say, it is quite good, for a crusted cheesecake. I might be biased on this topic (and every other topic). The dad-man by far has the strongest opinions about cheesecake compared to anyone else I know. An it has garnered rave reviews such as: “Damn it kid. You’re trying to make me fat.” As he’s going for another slice.
I do mention toppings in the recipe, and the examples are numerous. Here are some of my personal favorites:
- Macerated berries
- Caramel drizzle
- Fresh strawberries
- Chocolate Fudge
If you’re taking this cake to a party, I highly recommend a cake saver with a sturdy lid. I’m always terrified that it’s just going to slide off the seat.
While graham cracker crust cheesecake may not be a favorite in my house, it has been a crowd favorite at many gatherings. Pro crust or not, this cheesecake is definitely one to add to your recipe box no matter your baking abilities. Happy baking!
Graham Cracker Crust Cheesecake
Ingredients
- 2 pkg cream cheese 8 oz each
- 1/2 c sugar
- 1/2 t vanilla
- 6 oz graham crackers
Instructions
- Preheat the oven to 350 F.
- Layer graham crackers into the bottom of the pan. Set aside.
- Blend cream cheese, sugar, vanilla. Add eggs one at a time. Pour into the crust.
- Bake for 40 minutes; let cool for 2-3 hours. Add toppings and serve.
Notes
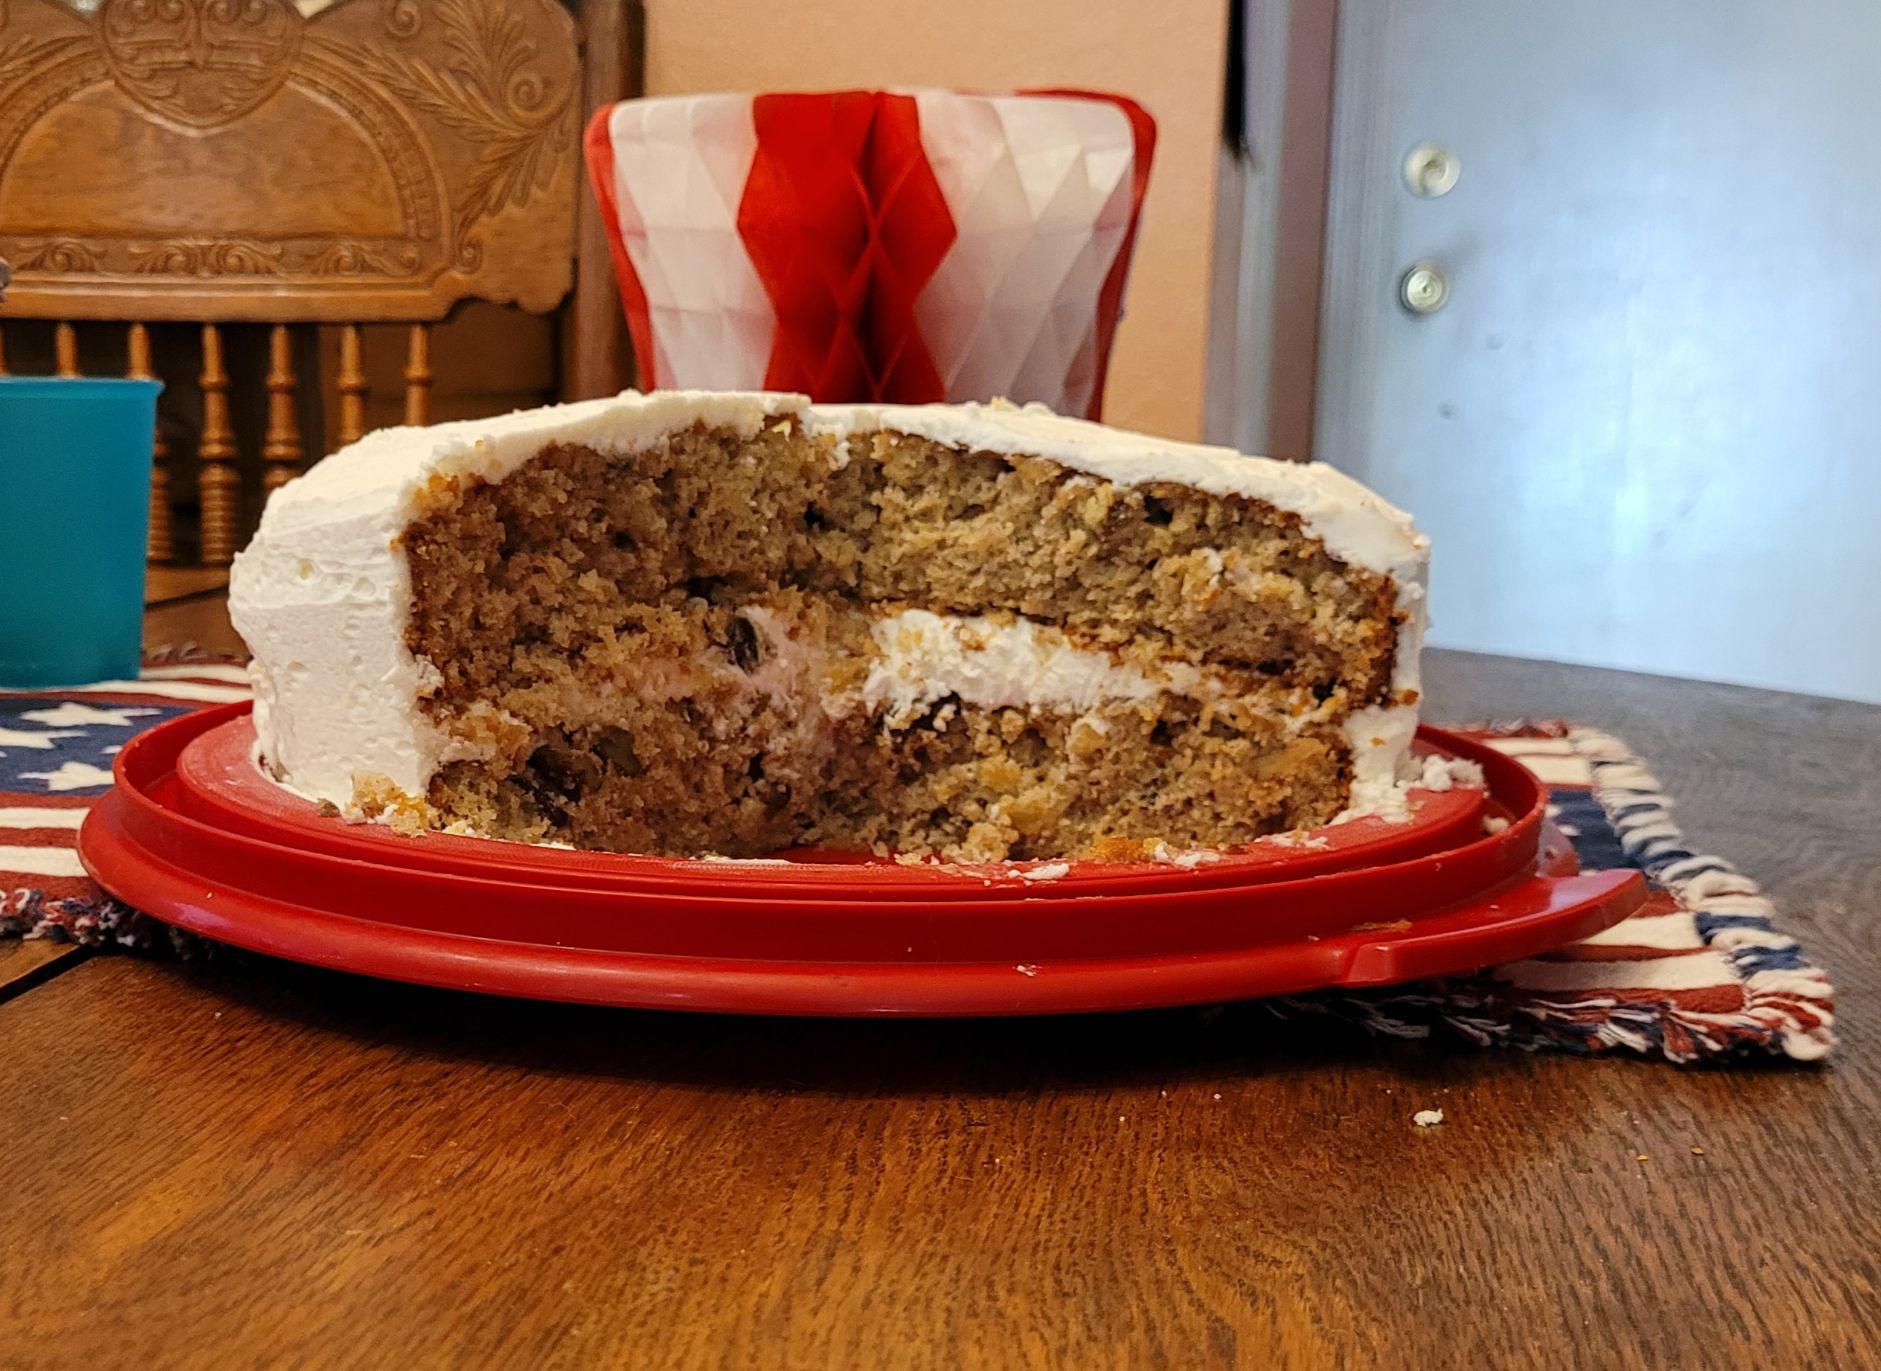
Hummingbird Cake
This post contains affiliate links; I earn a commission on purchases.
Hummingbird cake is a perfect addition to any summer barbeque. It is a little effortful, but I promise the work is worth it. It’s not too sweet and moist enough to refresh the summer. If you live in the desert like me, then you’ll want to serve it right from the refrigerator and store in there as well.
I usually make this cake for the fourth of July along side my stuffed burgers and church potato salad. Feel free to steal my menu and party plan this summer. I’ve only been making this for a couple of years, but it has been a fan favorite both times.
This is another Aunt Rae Special, haha. She bet me a couple of her recipes for the burnt sugar cake recipe I built. Needless to say, I won, haha. So now I have her permission to share this recipe with the masses because a cake this delicious shouldn’t be gate kept.
I learned to make and still make hummingbird cake using a natural gas oven. The cook time may differ depending on the type of oven you are using. I use this buttercream frosting as it doesn’t add too much sweetness to the cake. I usually store this cake in a vintage cake saver from Tupperware. I know shun me if you must, but it’s what we own. I’ve also found that this basic cake saver works great.

Hummingbird Cake
Ingredients
Bowl #1
- 3 c flour
- 2 c sugar
- 1 t salt
- 1 t baking soda
- 1 t cinnamon stick ground into fine powder
Bowl #2
- 1 c olive oil
- 1 can crushed pineapple 8 oz
- 2 c mashed banana over ripe/black
- 1 c chopped pecans
Instructions
- Preheat the oven to 350 deg.
- Grease & flour 2 round cake pans
- Add contents of bowl #1 to bowl #2. Do NOT use a mixer. Gently fold until just combined.
- Place cake pans on a baking sheet and bake for 30 minutes. Take the cakes out and let them rest for 10 minutes.
- Before returning the cakes to the oven, gently tap the bottom of the baking sheet to remove remaining bubbles and rotate the pan so the opposite side of the cake is towards the front. Bake for an additional 30 min.
- Let the cakes cool completely. Frost with Buttercream frosting. Sprinkle with additional pecans for decoration.
Notes
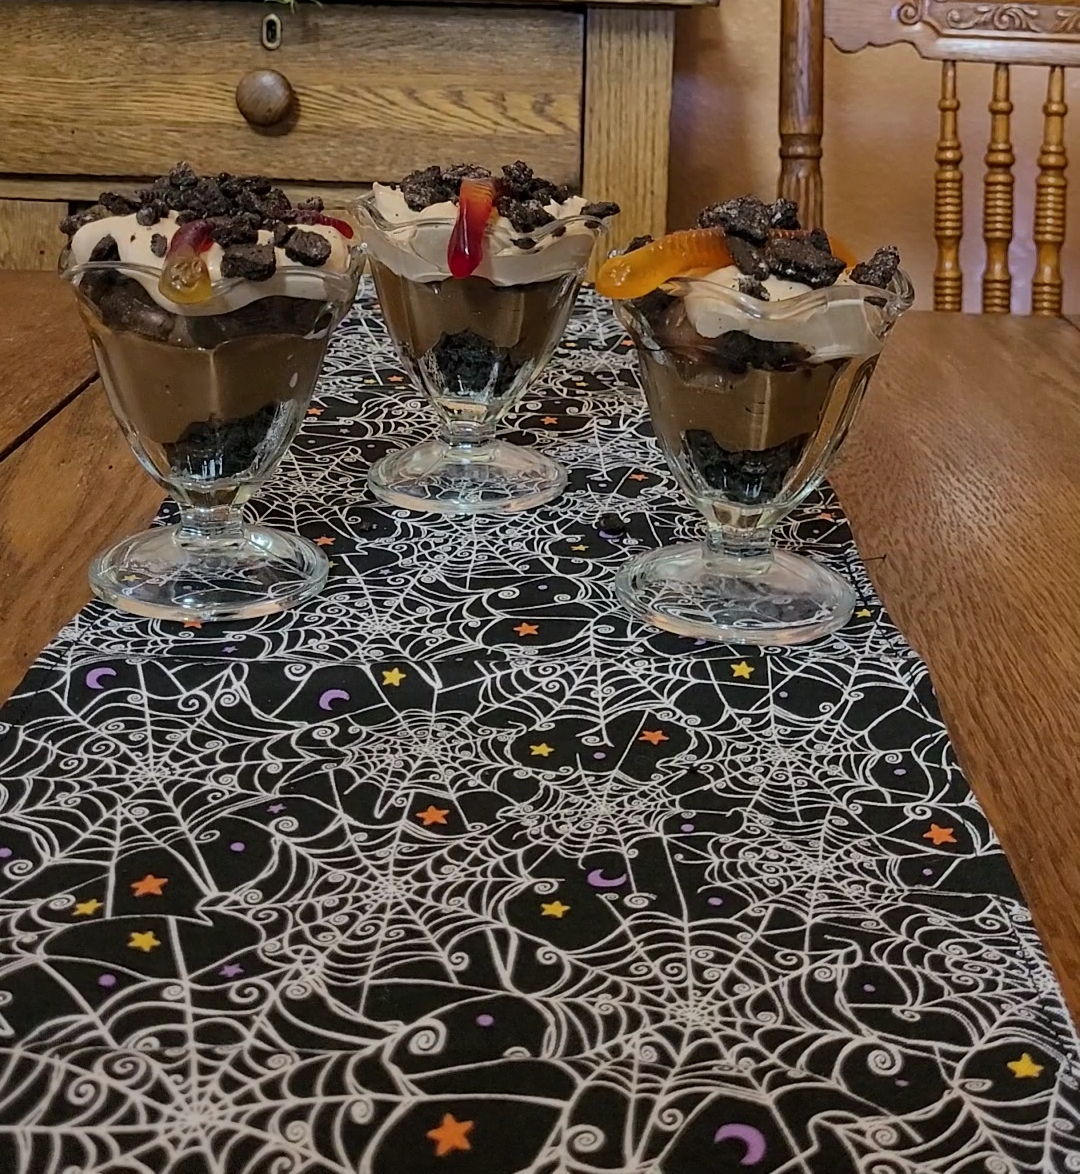
Worms and Dirt Pudding Cups
This post contains affiliate links where I earn a commission on purchases.
When it comes to Halloween treats, nothing quite captures the spooky spirit like worms and dirt pudding cups. These ghoulish delights are not only delicious but a fun and creative way to add a touch of fright to your Halloween entertaining.
Worms and dirt pudding cups were a staple in my childhood home. Only my mom didn’t put them in individual cups, she put it in a large baking dish. Why? Because at the start she was feeding thirty-something kindergarteners. As we got older, that never changed; our friends liked being able to pass by, get a scoop in a bowl and keep going.
Now, I’m obviously no longer a kindergartener (sometimes lol). I usually pre-make mine into individual cups because it’s prettier and more convenient for me. Not to mention it’s easier to share that way.
Let this spooky treat remind you of childhood and enjoy spooky season with nostalgia. I love how nostalgic this recipe is, despite the fact that so few people I come across know what it is. With that I hope you add this to your bag of tricks for Halloween or garden themed party. Happy Halloween!

Worms and Dirt Pudding Cups
Ingredients
- 2 cups cold milk
- 1 package chocolate instant pudding 4-ounce
- 1 container whipped topping, thawed 8-ounce
- 1 package chocolate creme cookies, crushed to crumbs 16-ounce
- 2 pkgs gummy Worms
Instructions
- Pour the milk into a mixing bowl and add the pudding mix. Beat with a wire whisk until well blended (about 2 minutes) and let pudding stand for five minutes.
- Fold whipped topping into one batch of pudding very gently until it is all the same color.
- Place about 1 tablespoon of the crushed cookies into the bottom of each cup, then add about 2 tablespoons of pudding to each cup.
- Repeat another layer of cookies, then pudding, ending with another layer of cookies.
- Finish by adding 2 gummy worms to the top of each of the cups.
- Put cups into the refrigerator for about one hour to chill.
