Breakfast Burrito: Desert Edition
You don’t actually have to make this breakfast burrito in the middle of the desert. That’s just the only time of year they get made in my family. Every year my dad goes camping in the middle of a wash up in Florence Az with a bunch of our friends with old jeeps. These burritos have made an appearance for about eight years now.
These breakfast burritos are made to travel, meaning you’re putting them in foil and going on your way. This also means that you can slap them on the fire in indirect heat to keep them warm and melt the cheese (my favorite part). Just be careful: foil gets hot and so does melted cheese.
Breakfast Burritos: Desert Edition
Ingredients
- 2 lbs chorizo sausage
- 12 burrito sized tortillas
- 12 eggs
- 6 russet potatoes
- 1 lb cheddar cheese shredded
Instructions
- Dice potatoes and cook them in a large skillet until tender. While potatoes cook, crack and whisk eggs in a separate bowl; set aside. Add chorizo and cook until browned.
- Pour in whisked eggs and cook, stirring everything together.
- Heat tortillas and store under a towel. Scoop about ½ to ¾ of a cup of potato mixture on tortilla; sprinkle with cheese and roll.
- Wrap burritos in aluminium foil and share. Serve with red sauce, sour cream or guacamole.
Salsa is a must have, even on the trail for burritos in general, but the toppings can go far beyond red or green sauce. You can serve these burritos with sour cream, guacamole, enchilada sauce. The opportunities are endless! Just remember to share, or else you’ll be eating your body weight in burritos for a month.
Whether you decide to cook these on the stove top, grill or a good old campfire, remember that building these is much better with friends and family. It makes the process go faster and you can share stories and a meal. Don’t forget to check out our Thanksgiving in the Desert process!
Breakfast Burritos: Desert Edition
Ingredients
- 2 lbs chorizo sausage
- 12 burrito sized tortillas
- 12 eggs
- 6 russet potatoes
- 1 lb cheddar cheese shredded
Instructions
- Dice potatoes and cook them in a large skillet until tender. While potatoes cook, crack and whisk eggs in a separate bowl; set aside. Add chorizo and cook until browned.
- Pour in whisked eggs and cook, stirring everything together.
- Heat tortillas and store under a towel. Scoop about ½ to ¾ of a cup of potato mixture on tortilla; sprinkle with cheese and roll.
- Wrap burritos in aluminium foil and share. Serve with red sauce, sour cream or guacamole.
Cold Spinach Dip
Cold spinach dip is one of those dips that is beyond not scalable purely because it’s so easy to make. It’s dump and go, make ahead; just all around a staple take with you food. I swear it is one of those recipes that everyone has, no one knows where it came from and it is always a hit.
My recipe for it happens to come from my Grandma Kathy Smith. Why specifically Smith? Because I grew up with chosen family and her son was actually the one I grew up around. His name is Lance; my god father is also Lance. His mother? Also Kathy (spelt the same way too). So the Smith was important, for us at least. Any way Kitchen lore aside, Grandma Kathy Smith is the epitome of southern lady, to me. She is where I got my gumbo, red beans and rice, bread pudding, and many other of my recipes from.
From personal experience, this dip is addicting if you are a fan of creamy dips. I have found that it does not work as well if you try to alter it to make less.
Cold spinach dip can be served with more than bagel chips or pita chips. I’ve found that slices of baguette, rolled in tortillas and regular saltine crackers work amazingly with the dip as well.
Cold Spinach Dip
Ingredients
- 3 c frozen chopped spinach, defrosted and drained
- 1 can water chestnuts 8 oz drained and chopped
- 2 T chopped green onion
- 1 pkg dry Knorr vegetable soup mix don’t use spring veg
- 1-1/2 c sour cream
- 1/2 c mayonnaise
Instructions
- Mix everything together and refrigerate for 4 hrs. Serve with bagel chips or pita chips.
Chorizo – The Arizona Way
Chorizo is a breakfast staple in my family, but the store-bought type just doesn’t sit right for cooking on the trail. We are no wimps in the southwest when it comes to spice, but spice comes in many forms. This recipe I’ve created (inspired by my high school lunch Lady Ms. Maria) has the perfect mix of spice, fat, and freeze-ability to act as an ice pack in the cooler.
We don’t always eat chorizo while camping, but it is a staple for it. When I make it at home I’ll serve it with hashbrowns and some scrambled eggs in a pan. It just tastes different in the kitchen versus from the tailgate of a jeep. So the serving is of course different. But here are some staple sides and toppings:
- Salsa (Jarred or fresh)
- Pico De Gallo
- Shredded cheese (fresh makes it better)
- Potatoes O’Brian
- Frozen Shredded hashbrowns
- Eggs
- Tortillas
I’m obviously no stranger to different styles of kitchen. But my main tip when you go to cook your chorizo is to have a well-seasoned cast-iron pan or a good non-stick pan because there is very little grease that comes off the meat. With that, if you cook anything in the same pan as the chorizo keep in mind that you may need to add some vegetable oil or butter.
This is a very scale-able recipe in the way of spiciness. If you like very spicy things, you can add more cayenne or pepper flakes. Or do like the southwest and have a spicy red sauce on hand.
Keep in mind here, my chorizo is usually made before hand and cooked at a campground, so the servings will vary. As well as varying by how big of a tortilla you use. Feel free to see the full burrito recipe here, it makes enough to share so plan accordingly.
Chorizo – The Arizona Way
Ingredients
- 1 lb ground turkey
- 1 lb ground pork
- 1 t garlic powder
- 3/4 t red pepper flake
- 1/8 – 1/4 t cayenne pepper
- 1 T dried onion flake
- 1/2 t hot pepper sauce
- 1-1/2 T chili powder
- 1 T white vinegar
Instructions
- Combine ingredients into a large bowl. Mix with clean hands.
- Portion into freezer safe bags. Freeze for up to 6 months.
Brown Sugar Espresso Drink Mix
This brown sugar Espresso drink mix can be made with instant espresso, instant coffee or decaf instant coffee. It makes a wonderful gift in a jar for the coffee lover in your life, or you can hoard it for yourself and drink your body weight in coffee. I personally enjoy doing both.
Brown Sugar Espresso Drink Mix
Ingredients
- 1 c Instant espresso powder can use other instant coffee
- 1 c Brown sugar
- 1 1/3 c non-fat powdered milk
Instructions
- Mix ingredients together. Store in a mason jar.
- To serve: Mix 3 heaping tablespoons of mix into 8 oz hot water or milk. Pour over ice for iced coffee.
Notes
Artichoke Pasta Salad
Artichoke Pasta Salad is a light yet fulfilling tortellini pasta salad. With marinated mushrooms, artichokes and chopped olives it is a dump and go meal for a hot day when you don’t want to heat up the house. Light and a bit funky with the crumbled feta, it is a great change from the extra savory pasta salads that come up in the summer.
Summers in Tucson are brutal, there’s no other way to say it and no one out here wants to cook on the regular. With end of the school year picnic and luncheons growing up the room parents struggled to provide the teachers with the food they deserved. But, this pasta salad from Ms. Ima Kemp (back in 2006) came in clutch whenever they needed a easy and delicious side to feed teachers.
Hate to break it to you, but you will have to turn on the stove for just a couple minutes to boil water and cook your pasta. I find it easiest to cook the tortellini in the morning before it hits 100 degrees by 9 am in Tucson. Now, I don’t have the humidity that others do, but I have to assume that it makes it just as bad to cook.
Letting the salad sit once it’s mixed is imperative in my opinion. It doesn’t have to be for long, but the longer it sits, the better it gets. When serving this dish, I find that this pasta salad is not as good when you add meat to it. Additionally, you may have to add more dressing as the cheese and pasta soaks up the dressing.
Whether you’re taking this to your next summer potluck or eating it as an easy dinner, don’t forget to savor the time around the table. Stay cool this summer and enjoy a cool meal around the picnic table.
Artichoke Pasta Salad
Ingredients
- 1 lb tortellini, cooked & rinsed according to package
- 3 small jars marinated artichoke hearts, drained but not rinsed
- 1 jar marinated mushrooms, drained but not rinsed
- 1 pkg crumbled Feta 6-8 oz
- 1/2 – 1 c Italian dressing
- 1 can diced black olives 4 oz
Instructions
- Cook pasta according to the package and rinse.
- Roughly chop artichokes. Combine ingredients, refrigerate for an hour and serve.
German Chocolate Cupcakes
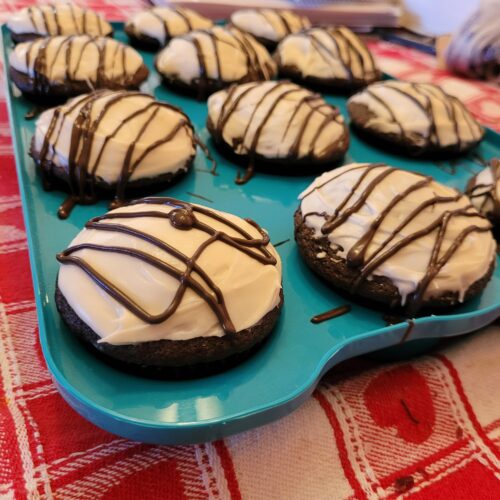
German chocolate cake is a favorite in my family because we aren’t huge fans of super sweet desserts. These German chocolate cupcakes are the perfect solution for that after dinner need for dessert without giving yourself the unpleasant feeling of eating too much sugar.
Before I received this recipe, I would make a black forest cake recipe without the frosting because the dad-man doesn’t like frosting. Instead, I would make cherry compote and top the slices of cake with that and whipped cream. As strange as it sounds, it takes more work to put that cake together than the cupcakes. I have tried to turn that cake into cupcakes and they just turn out tough. Now, that could be baker’s error, but this recipe I’m showing you is made to be cupcakes.

This particular recipe comes from family friends, John and Tonja. The recipe dates back to the 1800s and was brought to America from Germany by John’s great grandmother when she migrated here. It is an honor for me to have a family recipe like this from people I consider family, but not by blood. These cupcakes are a perfect example of the bond that food can help form in a community.
These German Chocolate cupcakes are a simple, delicious treat perfect for your next potluck or to simply end your Sunday meal. They taste best if you keep them in the refrigerator until you want to eat them. I also added a dark chocolate drizzle to the top for some added decoration. When you try out this recipe, like any recipe, I highly recommend making it as written first and then changing things to fit you and your family’s tastes.

German Chocolate Cupcakes
Ingredients
Cake
- 1 egg
- 1/2 c cocoa powder
- 1/2 c butter
- 1/2 c sour milk
- 1 t baking soda
- 1 c sugar
- 1 1/2 c flour
- 1 t vanilla
- 1/2 c boiling water
Frosting
- 1 T butter, softened
- 1 c confectioner’s sugar
- 1 t vanilla extract
- Carnation evaporated milk
Instructions
- Place baking soda into sour milk (2 t vinegar in at least 2% milk), stir to dissolve. Combine all ingredients except boiling water and stir. Add boiling water and stir. Pour into lined cupcake tins. Bake at 350 degrees for 18-20 minutes. Makes 12 cupcakes.
- Melt butter and mix in vanilla. Add to the confectioners’ sugar. Add food coloring for added fun. Add milk one tablespoon at a time until it’s a spreadable consistency.
Trail Ready Sandwiches
These trail ready sandwiches are a meat lover’s dream on bread. They were a go-to sandwich for the dad-man when he went out four wheeling or camping. A lot of times he’d take all the ingredients with him and make them himself, but I like the compliments I’d get from my Jeep family when I would make the sandwiches in camp or send them with the dad-man.
These sandwiches were my gateway into menu making. I would make the menu and grocery list for the dad-man when he went out camping (he still does, but packing looks a bit different now). My menu making has grown exponentially since I started helping the dad-man. I’ve made him burgers, chorizo, salsa and the list goes on. But no matter what I make him, these sandwiches are a staple.
Trail Ready Tools
I’m not going to leave you out in the cold here; the tools are just as important as the ingredients when you’re out camping or trying to make these babies at 3 am before heading out.
- Paper Towels
- Aluminum Foil
- Mini Spatula
- Bread Knife
- Small mixing bowl
I like to have about half a pound of meat on each sandwich, but a good rule of thumb is 6 oz of total meat per sandwich. You will not need all of the meat for these sandwiches and that is by design. When you’re camping you don’t always want to stop and eat a full meal; I roll the meat with cheese and eat it as is when I don’t feel like a full meal.
Trail ready sandwiches are a staple for my jeep family. Honestly, the altitude and adventure is what makes them taste better. I’ve made them at home, and it is not the same. Add these sandwiches to your next adventure! Or your lunch menu. Don’t forget to check out the full menu here. Happy camping and cooking from my family to yours.
Trail Ready Sandwiches
Ingredients
- 1 loaf Sourdough bread approx. 10 slices
- 1 lb Thin Sliced Deli Swiss Cheese
- 3 T Delicatessen Mustard
- 1/2 c Mayo
- 1 lb London Broil Roast Beef
- 1 lb Mesquite Roast Turkey
- 1 lb Tavern Style Ham
- 1 Jar Sandwich Slice Pickles
Instructions
- Mix mayo with mustard. Spread a liberal layer of dijon-mayo mixture onto both slices of bread all the way to the edge.
- Layer the cheese on one slice of bread followed by the pickles, turkey, beef and ham. You can add another layer of cheese here, or just put the top on the sandwich.
- Cut the sandwich on a bias. Wrap each half of the sandwich in a layer of paper towel and put them together on your tin foil. Firmly wrap the sandwich to help prevent cooler water from getting in.
Butterfinger Cake
This post contains affiliate links where I earn a commission on purchases.
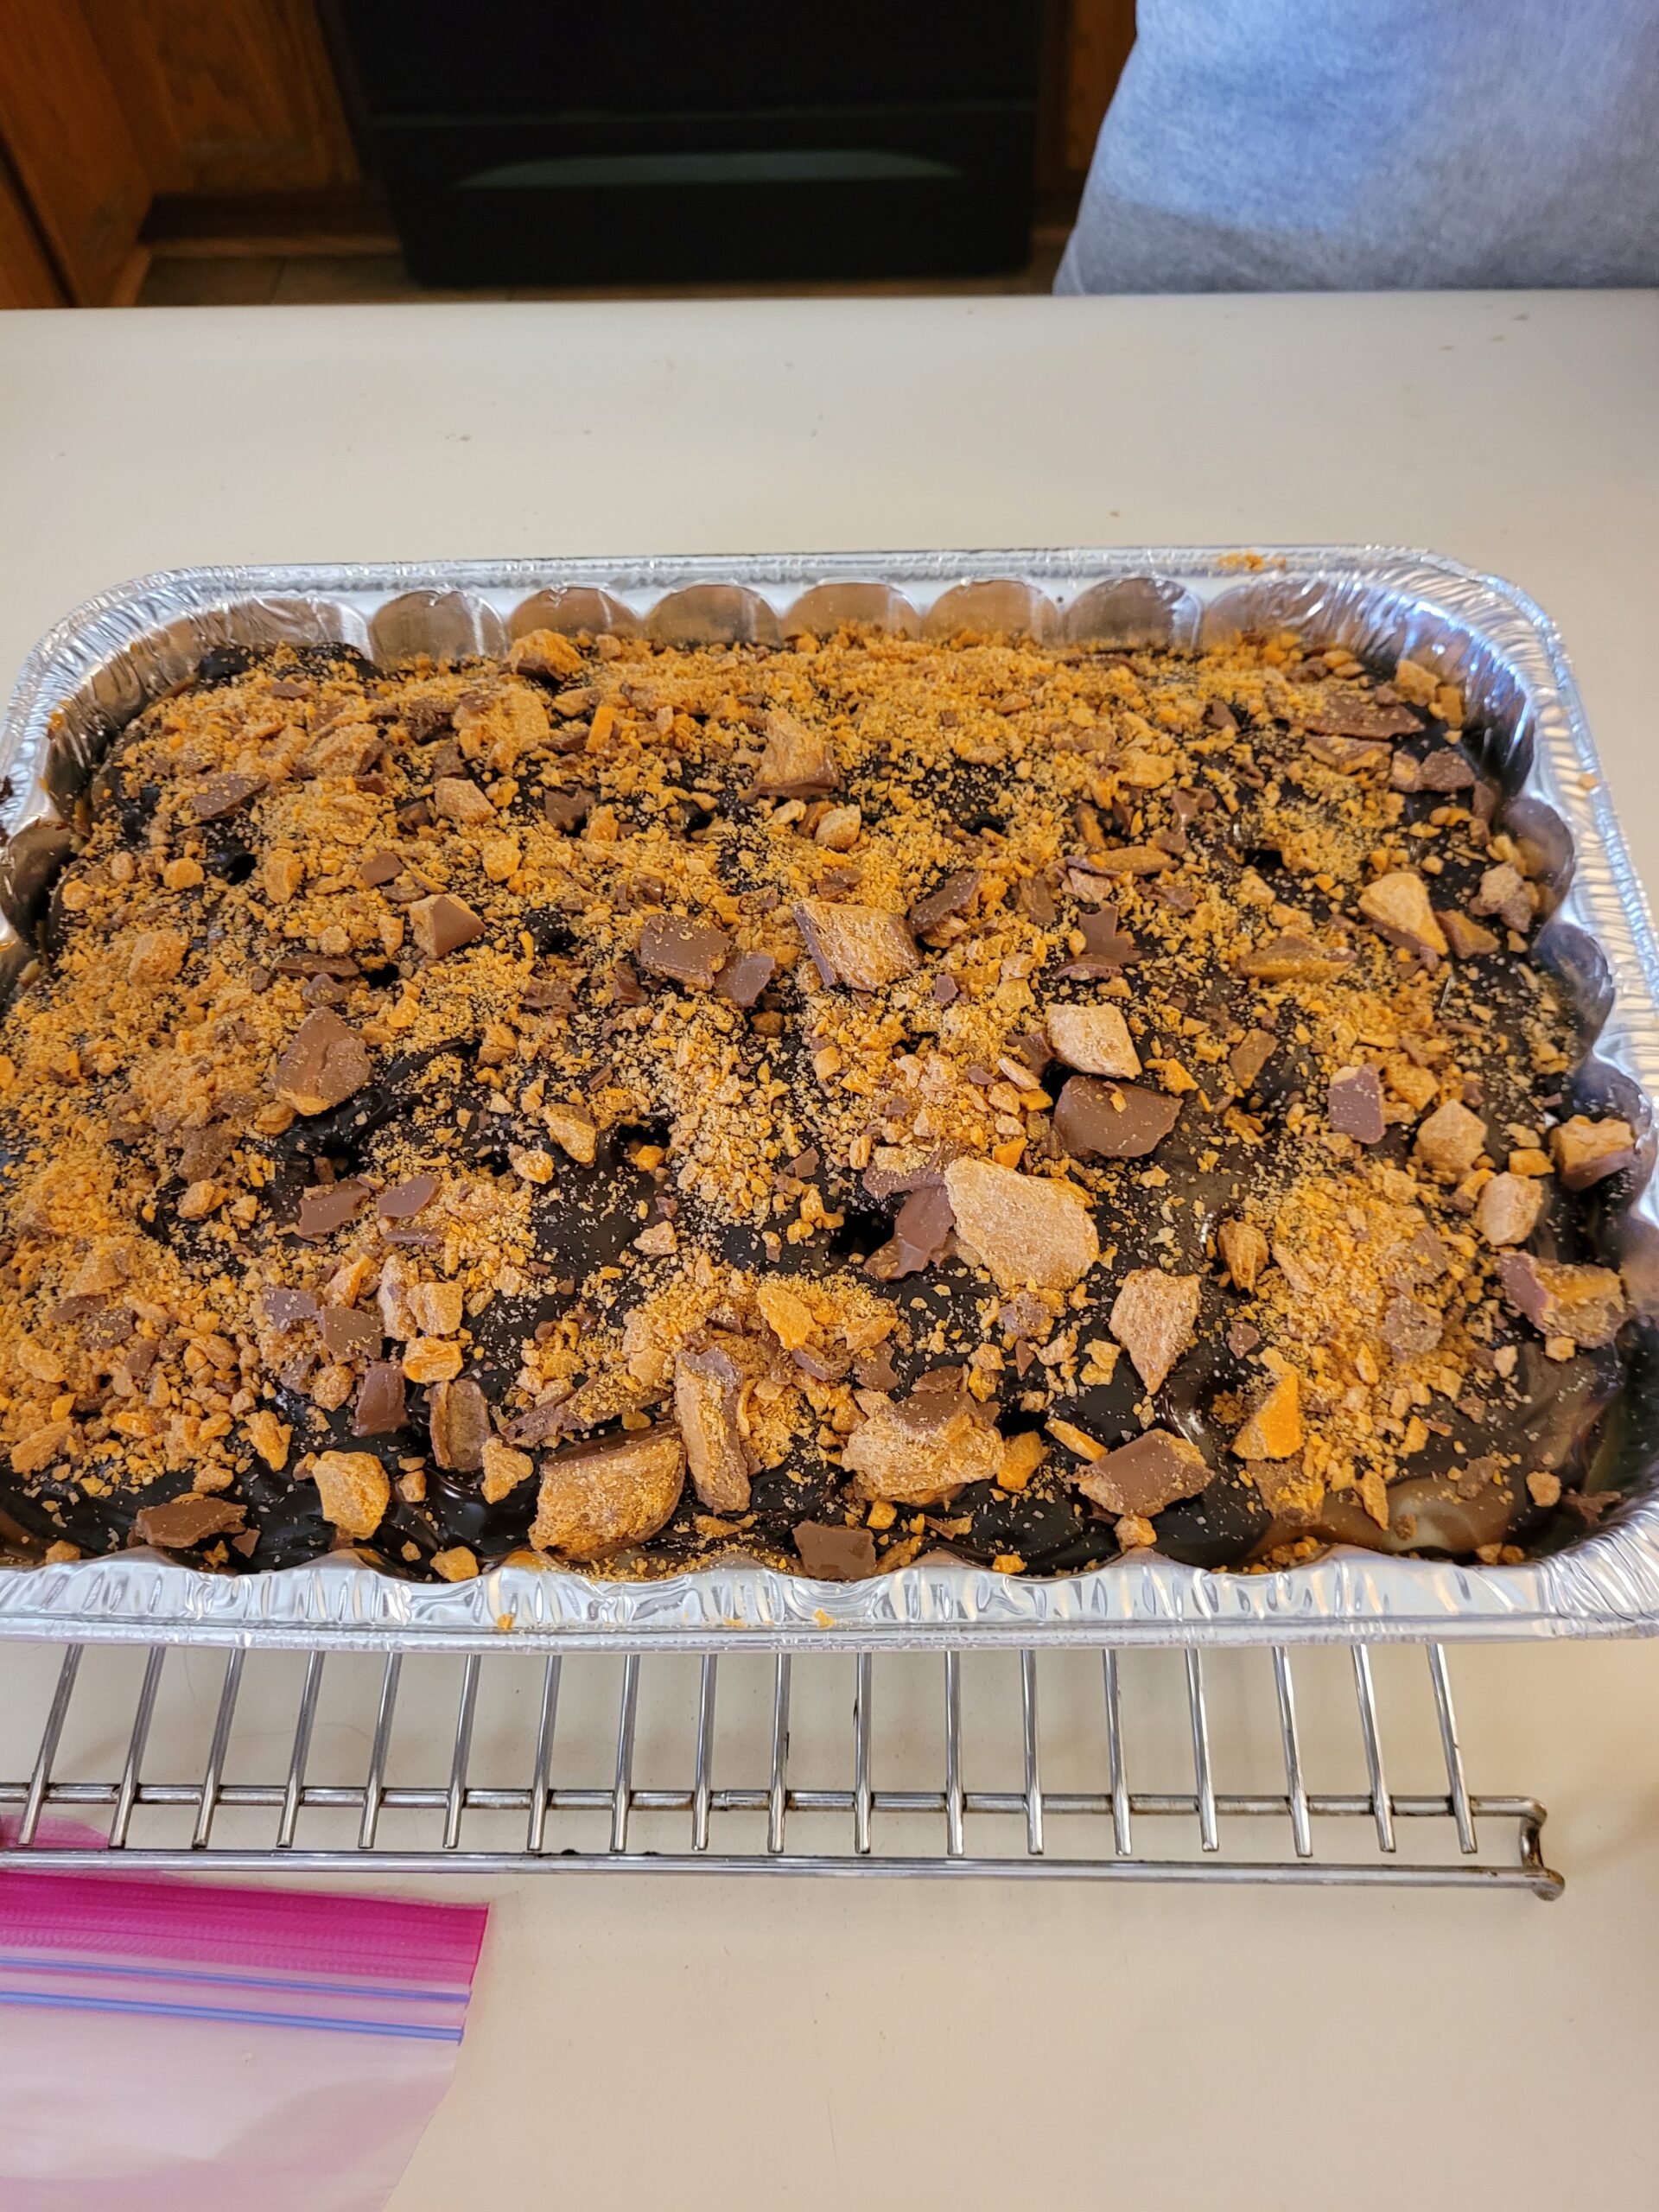
Butterfinger cake is one of those desserts that makes you gain weight by just looking at it. We usually only make this rich and decadent dessert in the summer. Why? There is a pool, slip-n-slide, or sprinkler nearby because, oof, you’ll need to work it off after just a small piece. That being said, everything in moderation. You can’t go into eating this cake with the assumption that you’ll be able to eat a regular sized slice. It serves roughly 30, cut into two-inch squares. It is that rich.
I don’t know exactly where this recipe came from, but I just remember it showing up at every school function with a cakewalk or potluck put on by the PTA of my elementary school. Or even the yearly carnival they had at the school to celebrate the summer break.
While I was in elementary school the room parents (mostly moms), made cookbooks at the holidays out of written recipes and traditions that the students would bring in. Low and behold that recipe made it into at least one of the two books that got made. I highly doubt that room parents, let alone whole class projects are a thing. But it is a fun memory that I treasure through cookbooks my mom kept.
Butterfinger cake is best made in a foil pan that you can recycle or chuck in the bin after the cake is gone. Trust me. I’ve tried to clean a glass pan after the fact and the combo of caramel, sweetened condensed milk, and butter finger does not come off easily from a glass pan.
Whether you’re make this for a school, church or random get together it is sure to make waves. It doesn’t matter if you’re familiar with such events, this cake is always a crowd pleaser. Don’t forget to share recipes whenever you can and keep tradition alive.

Butterfinger Cake
Ingredients
- 1 box Butter recipe chocolate cake mix Duncan hines
- 1 can sweetened condensed milk Eagle brand
- 1 jar caramel sauce
- 1 jar hot fudge sauce
- 1 tub cool whip
- 1 bag butter finger bits or 4 full size Butterfinger bars
Instructions
- Make and bake the cake as directed on the box. Let cool for 5 minutes.
- While warm, punch holes in the cake with the back of a wooden spoon. Pour the can of sweetened condensed milk over the cake, followed by the caramel and hot fudge. You may have to heat the hot fudge to get it to pour properly. Pour ⅓ to ½ the bag of butterfinger bits over the cake (or two crumbled butterfinger bars).
- Cool for at least four hours. Overnight is better. Pre-cut cake into 18-24 pieces for easier serving.
- Top the cake with the tub of Cool Whip and another ⅓ to ½ of the Butterfinger bits (or other two crumbled Butterfinger bars).
- Serve cool.
Notes
- Cake is best made a day ahead. Keep it in the fridge.
- Yellow cake works just as well.
- I recommend cutting the cake into 2 inch squares in the pan before adding the cool whip for easier serving.
Lemon Glazed Butter Cake
This Post contains affiliate links. Read the full Disclosure here.

Lemon glazed butter cake is a citrusy celebration of everyone’s favorite sour fruit. It’s perfect for any occasion from a spring tea party to a summer get together with the family. And summer is going to come way quicker than we want it to.
Lemon Butter Cake’s Story
This recipe was one that I found in the depths of my great, great grandmother’s baking recipe book. Now, she passed well before I ever existed and the only stories my mom has of her is that she was an Amazonian of a woman and loved to make sure everyone was fed.
I’m also slightly convinced she was a witch, haha. Everyone’s convinced I am too, so I had to get it from somewhere. As I went through her recipes, more would appear and be written in nearly illegible writing. I mean I read it just fine, but many people in today’s society would not know what the instructions are.
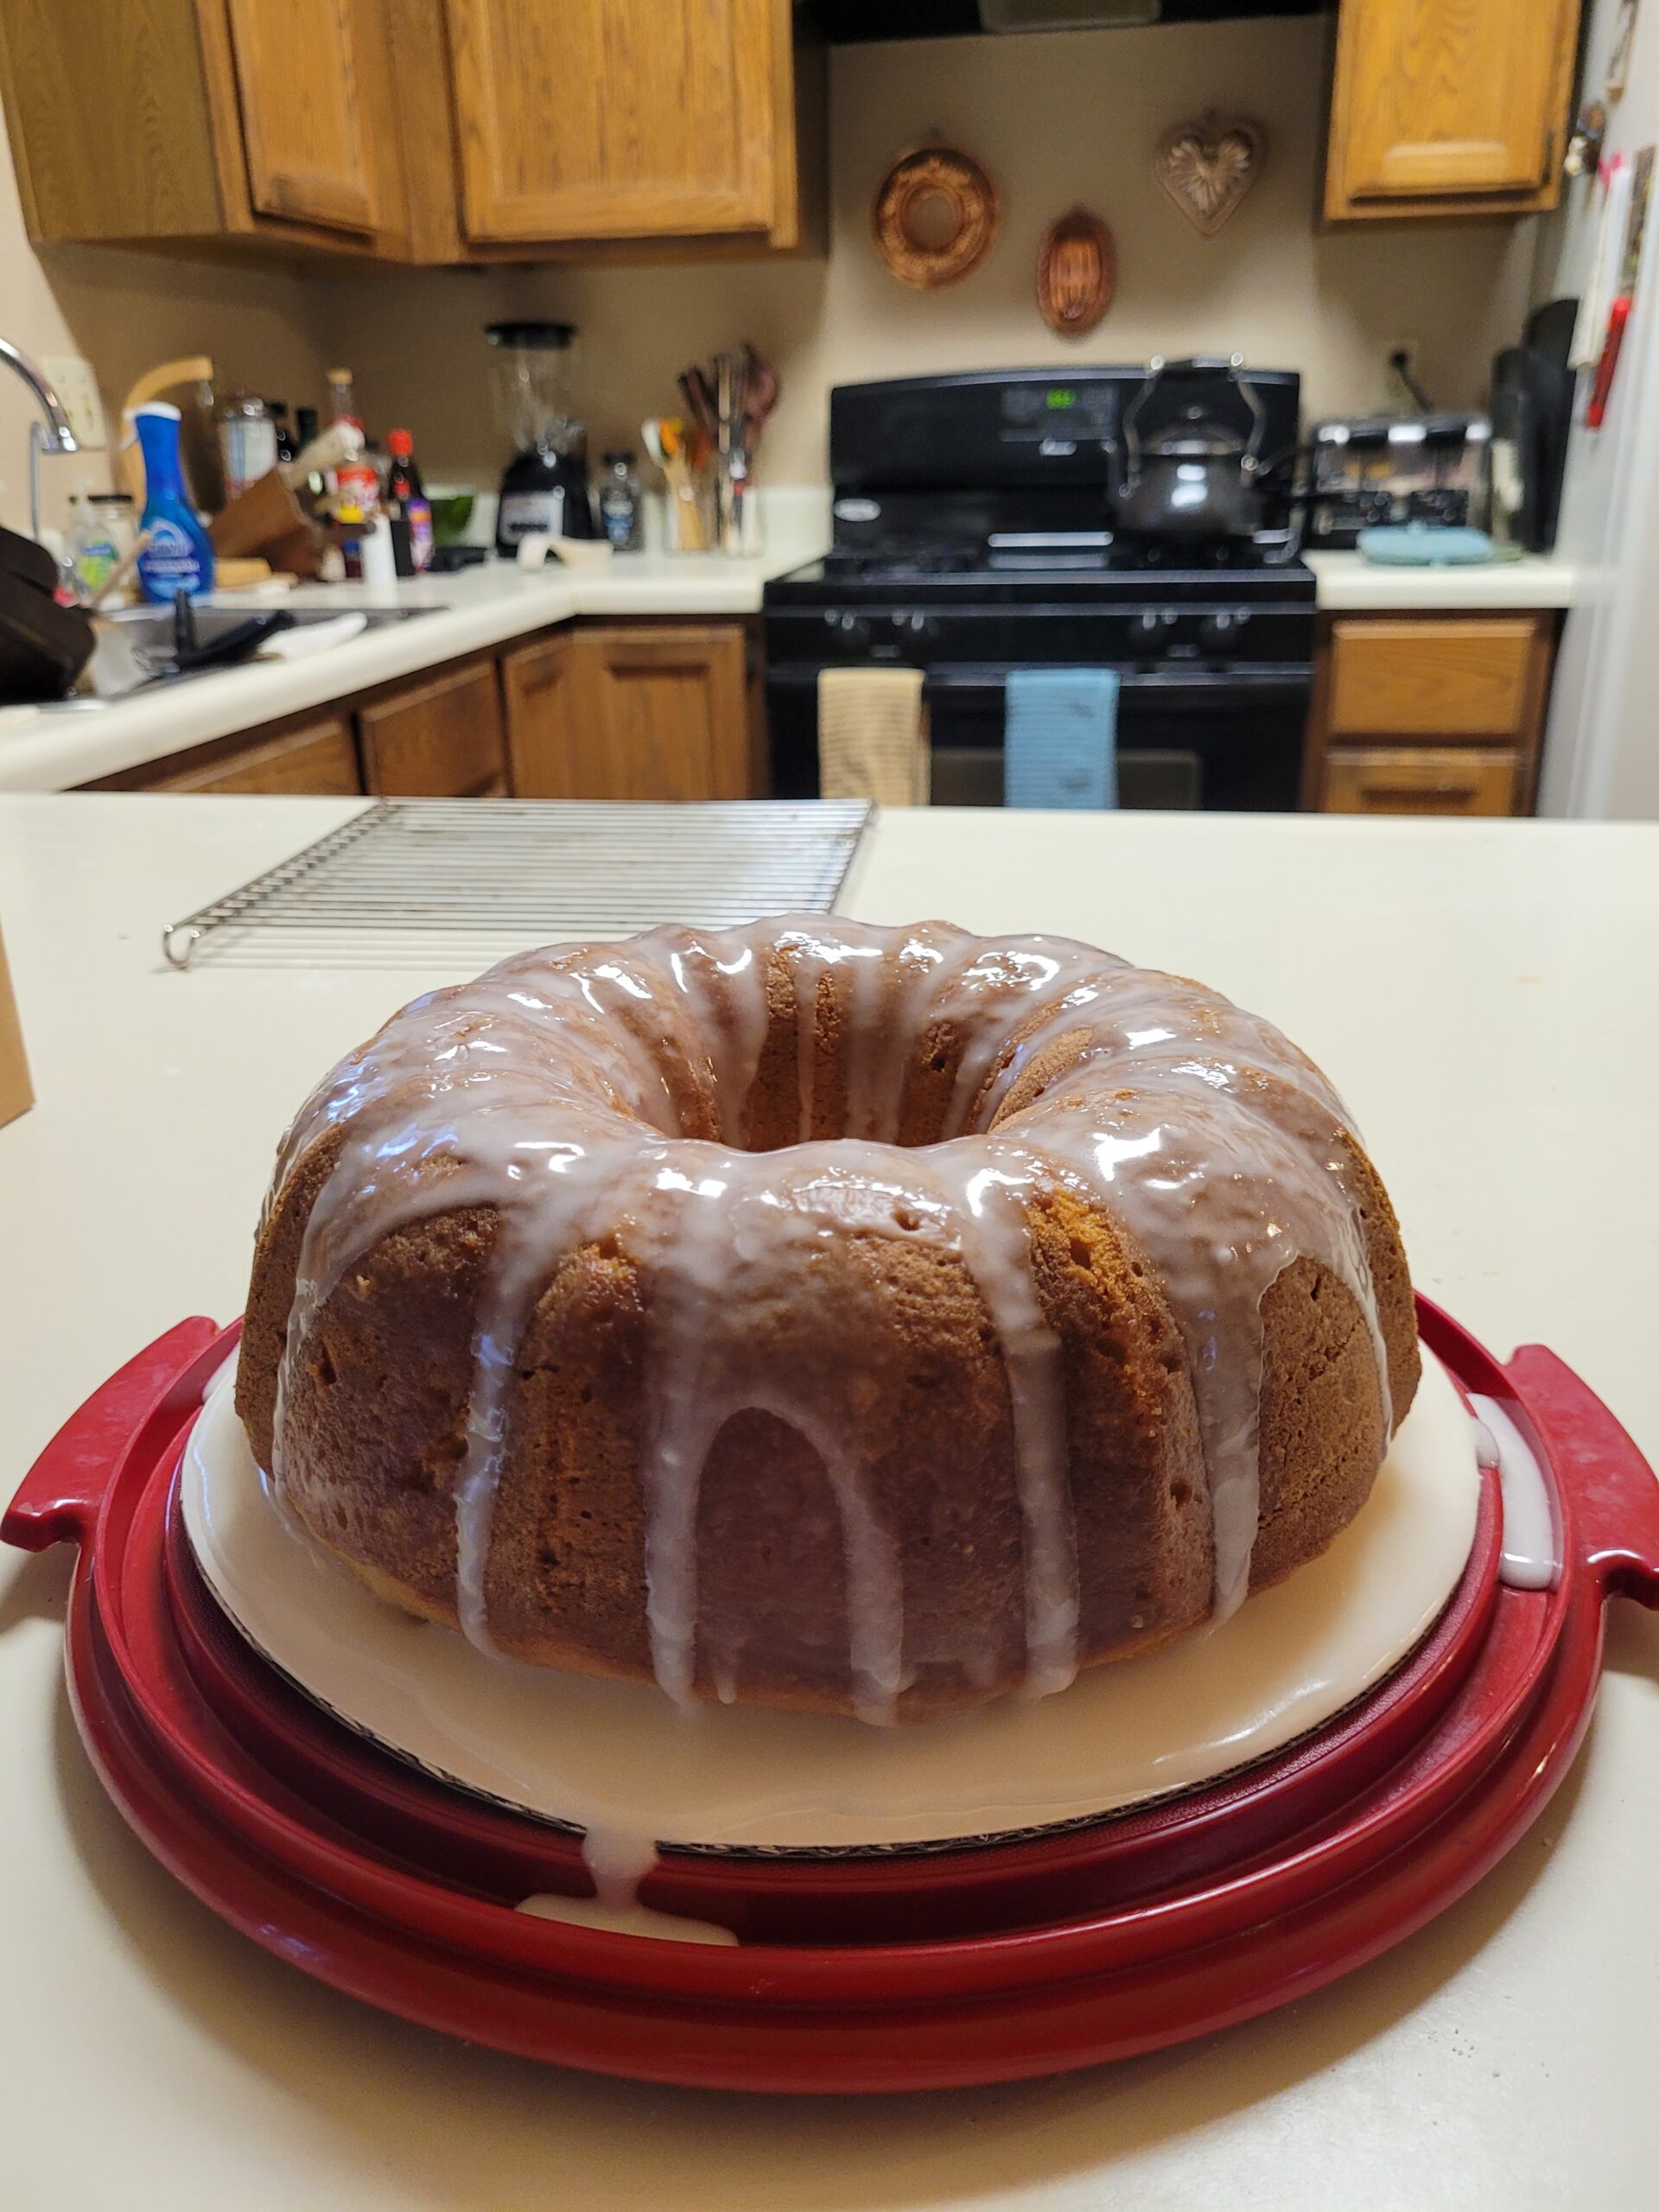
Lemon glazed butter cake always makes a splash at gatherings, especially in the horrid heat of the Arizona Summer. It is by all definition an easy refreshing dessert without being a cooled dessert. The glaze turns to a wonderfully crunchy coating that lets the cake stay moist especially when you put it in a cake saver overnight. As is butter cake, it can be dense, but it shouldn’t be dry. If it seems dry after the first attempt, add a bit more liquid to the recipe.
Lemon glazed butter cake is a great recipe to add to your dessert rotation. Whether you choose to make this your weekly dessert or bake it for a celebration this summer, be sure to enjoy every bit of it. You are making heirlooms that are meant to be enjoyed and shared with loved ones. Happy Baking!

Lemon Glazed Butter Cake
Ingredients
Cake
- 1 c butter room temp
- 1-1/4 c sugar
- 3 large eggs
- 2 t baking powder
- 2 t lemon zest grated
- 3/4 t lemon extract
- 3 c all purpose flour
- 1 c milk
Glaze
- 1/2 c lemon juice
- 3- 1/2 c powdered sugar
Instructions
- Cream butter and sugar until fluffy, beat in eggs one at a time. Mix in baking powder, almond extract, and lemon zest at a low speed.
- Add flour and milk, alternating, and beating after each addition.
- Scrape bowl with a spatula. Pour batter into a greased and floured tube pan. Tap the pan on the counter 2 or 3 times to burst air bubbles.
- Bake at 350 deg for about an hour, or until the cake leaves the sides of the pan. Set cake on rack and cool for 5 min, run a knife around the tube of the pan.
- Make glaze by mixing the lemon juice and powdered sugar until smooth. Set aside about half a cup.
- Pierce cake every inch or so with the same knife and pour glaze over top. Let the cake cool for at least 6 hrs. Remove from the pan and pour the remaining glaze over top before serving.
Sheet Pan Fry Nachos
This post contains affiliate links where I earn a commission on purchases.
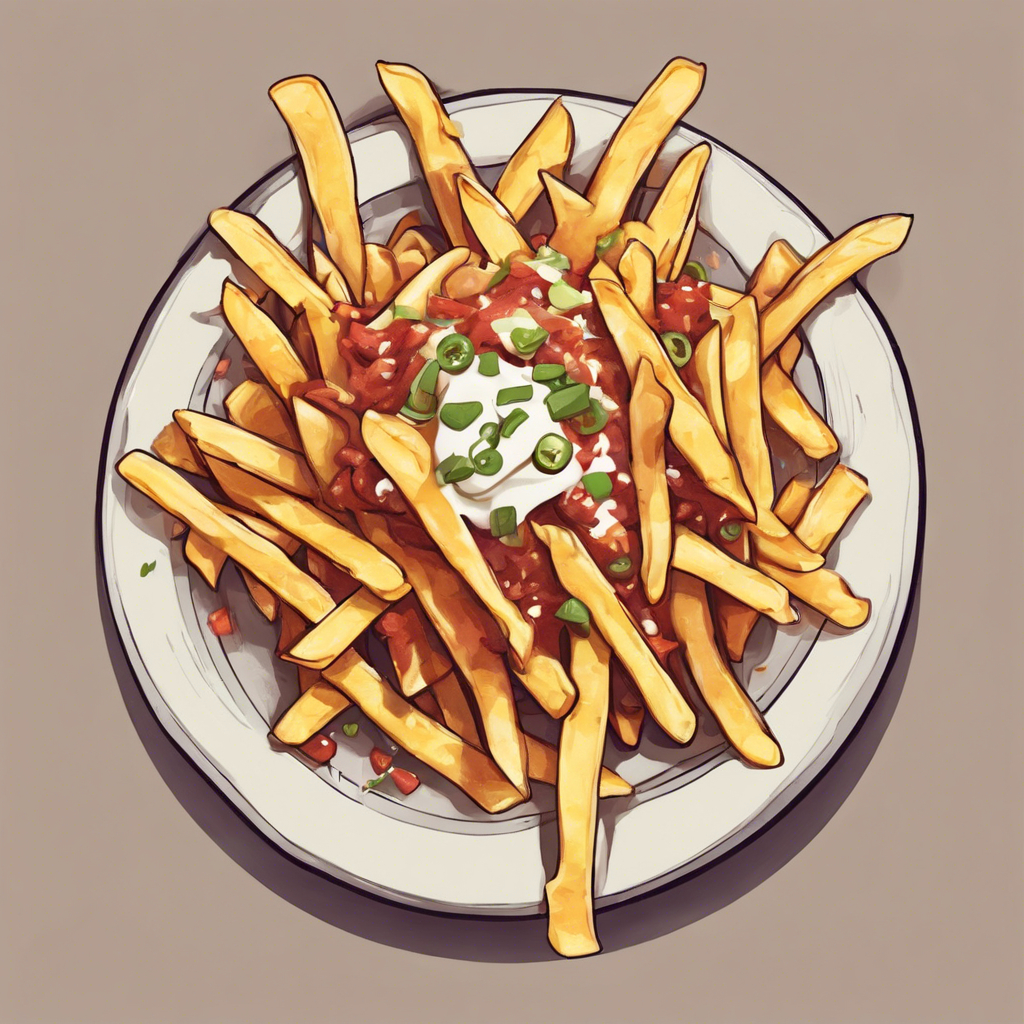
Sheet-pan French fry nachos are the cheater’s way to a potato skin. It is a quick and easy snack or side dish for any potluck occasion, though I’ve noticed that it works best for things like sports parties or casual game nights.

This is a more recent addition to my culinary rounds. I did not grow up eating these, at least not in this context. I ate a lot of chili cheese tots. Potatoes and cheese has always been my favorite food combo.
You can top these with pretty much anything your heart desires; I prefer the traditional toppings of potato skins. They tend to go with what I serve at game nights.
Fry nachos have endless topping combinations! While don’t recommend letting everyone top their own, you can definitely for that. I totally understand that the bacon cheese route is not for everyone, so, here are some of my favorite alternative combinations:
Chilli-Cheese: Chilli dog sauce, shredded cheese, diced onion, jarred jalapeno rings
Sonoran Fries: refried beans, shredded cheese, pico de gallo, sour cream
Cheesesteak Fries: steak-ems, provolone, sauteed onions and peppers
BBQ Pork: Pulled pork, shredded cheddar, cheese sauce, coleslaw, BBQ sauce
Street Corn: Roasted corn, chili powder, crema, and parmesan cheese
Whether you’re enjoying these fry nachos as your next game day side dish or serving it with your weeknight sloppy joes, I hope you enjoy. Happy cooking.

Sheet Pan Fry Nachos
Ingredients
- 1 pkg Frozen fries 22 oz
- 2 T Seasoning salt
- 2 c cheddar cheese, shredded
- 1 pkg Thin cut bacon
- 3 Green onions
Instructions
- Cut bacon into half inch pieces and fry until crisp; drain on paper towel and set aside. Season french fries with seasoning salt or just plain salt. Bake fries as directed on the package.
- Once fries are cooked, top with shredded cheddar cheese, bacon and green onions. Return to the oven for about 5 minutes or until the cheese is melty and bubbling.
- Serve hot with ranch dip, sour cream or spider web dip.
